Mailing via Official WhatsApp
Mailing in ChatApp is a tool with flexible capabilities: build a client base for mailing from chats where conversations have already taken place or from chats with a specific tag in Scenario Dialogs, or upload contacts from a CRM via file. Personalize messages using variables. After the mailing is completed, a detailed report is generated, which can be downloaded and analyzed.
How to create a mailing
Go to your personal account → “Automation” → “Mailings” → Select a channel.
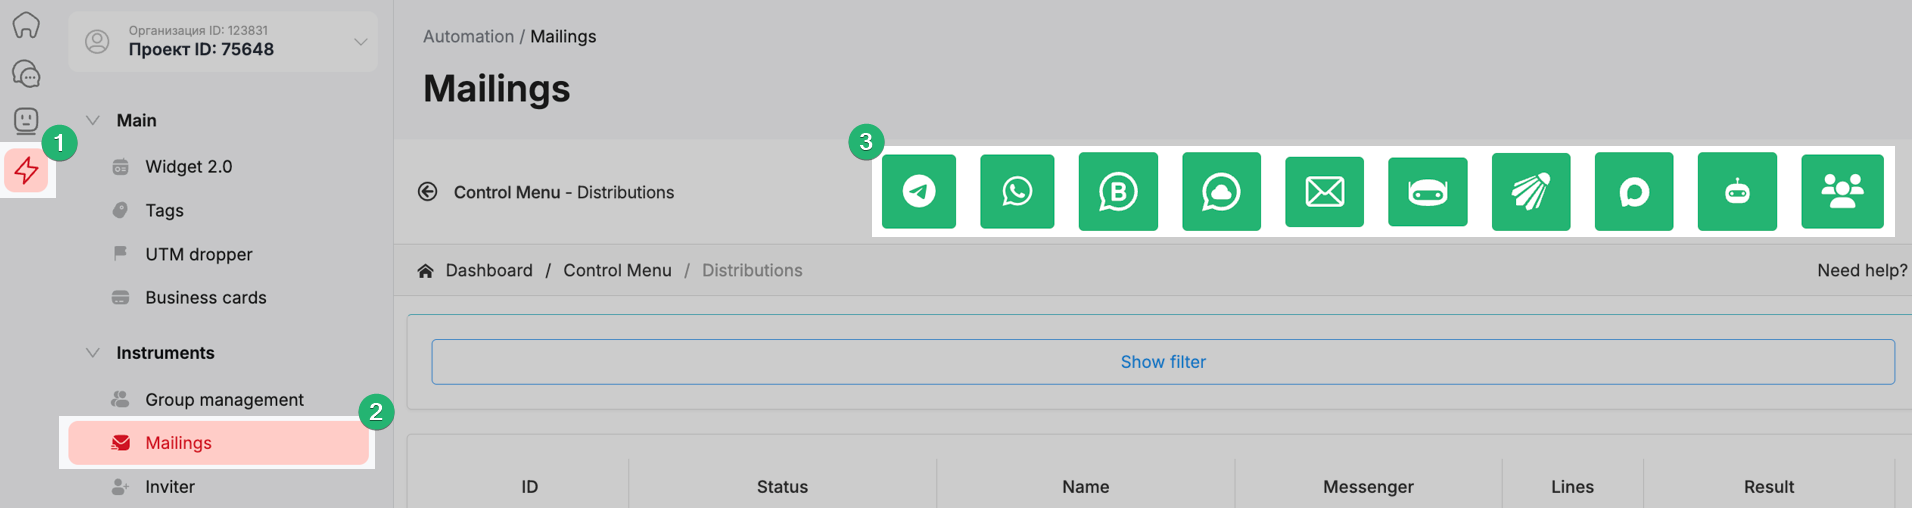
If the selected channel is not connected to a line, creating a mailing is unavailable.
In a demo line, there is a limit: no more than 20 recipients per mailing.
In a purchased line, there are no limits on the number of recipients.
If the number of contacts exceeds the available limit, split the mailing over several days. Check the limit.
-
Mailing name
-
Working days (select the days on which the mailing will be sent)
-
Start date and end date of the mailing
-
Start time and end time of the mailing
-
Time zone. The mailing will be executed at the specified time.
-
Configure the interval between sending messages.
For official WhatsApp, you can set the interval to 2 seconds. -
Select the line through which the mailing will be sent.
You can select one or multiple lines. If multiple lines are selected, sending will occur sequentially — one message from each line.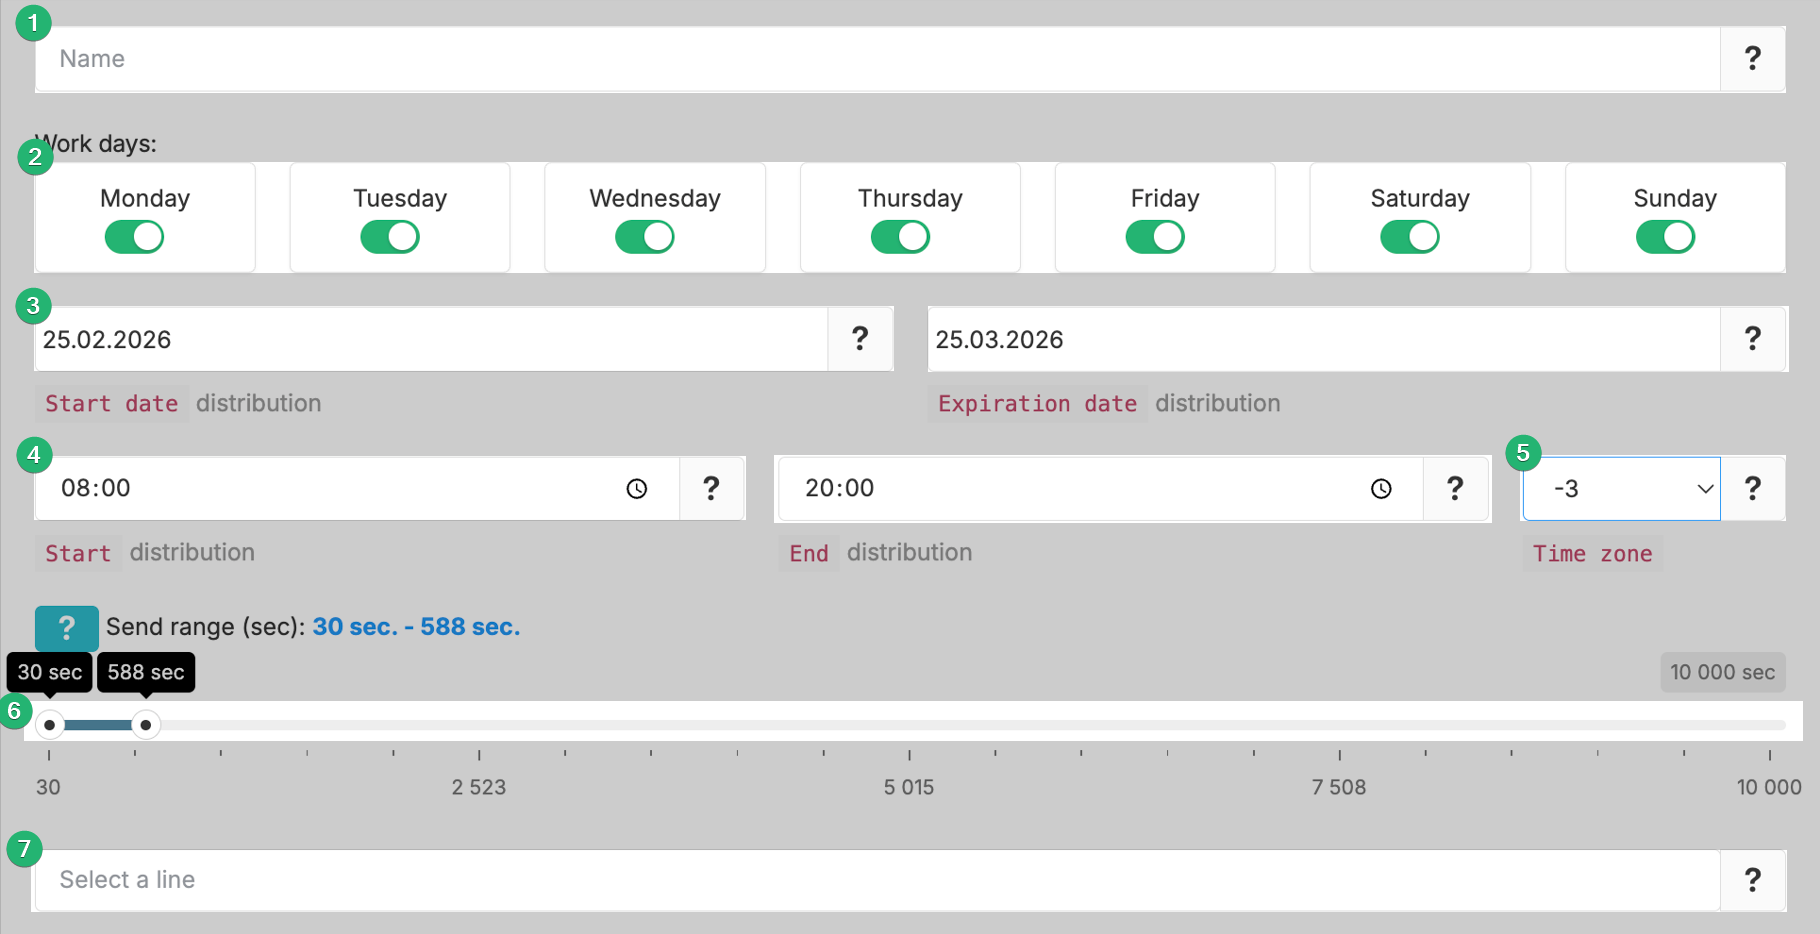
Click the “Upload dialogs from line” button — all chats from Scenario Dialogs for the selected line will be loaded into the table. Suitable for repeat sales, notifying current clients about statuses and updates.
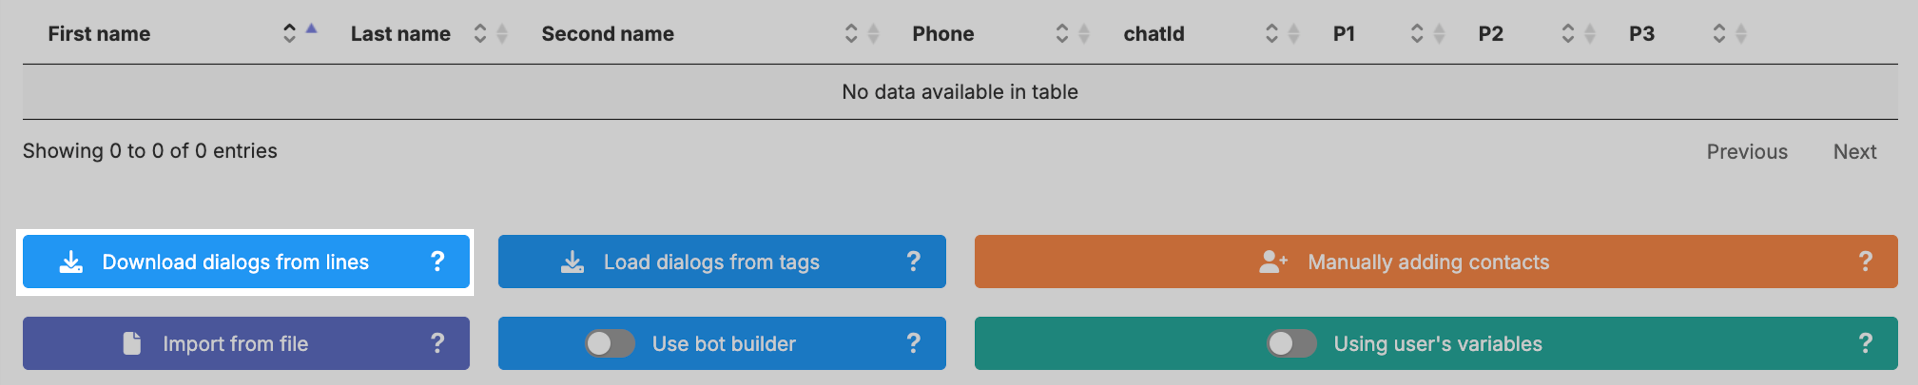
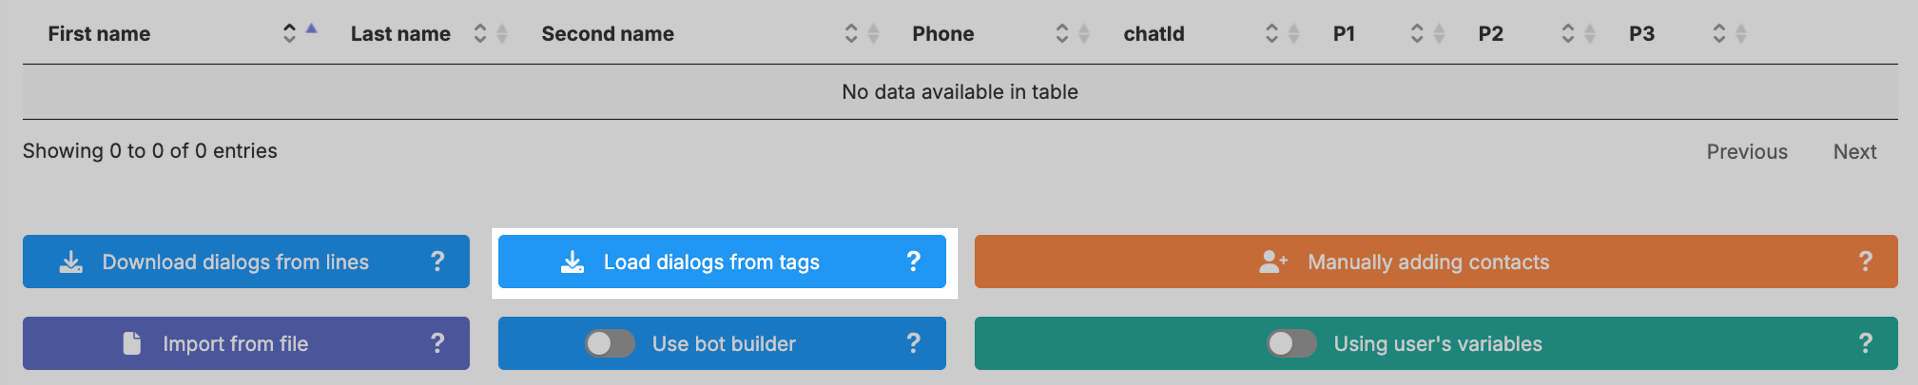
Click “Upload dialogs from tags” → select the required tag — the system will add all dialogs from Scenario Dialogs for the selected line that have been assigned the selected tag.
This allows you to segment your audience and send messages to a specific group of clients, for example: “Paid” or “Awaiting delivery.”
To upload client contacts from a CRM, export the contacts from the CRM into a CSV or Excel file.
Instructions:
• How to export contacts from Bitrix24
• How to export contacts from amoCRM
After exporting, the file must be edited according to the mailing file requirements. A sample file can be downloaded by clicking the “Import from file” button.
Click the “Import from file” button → select the file format — Excel or CSV → attach the file.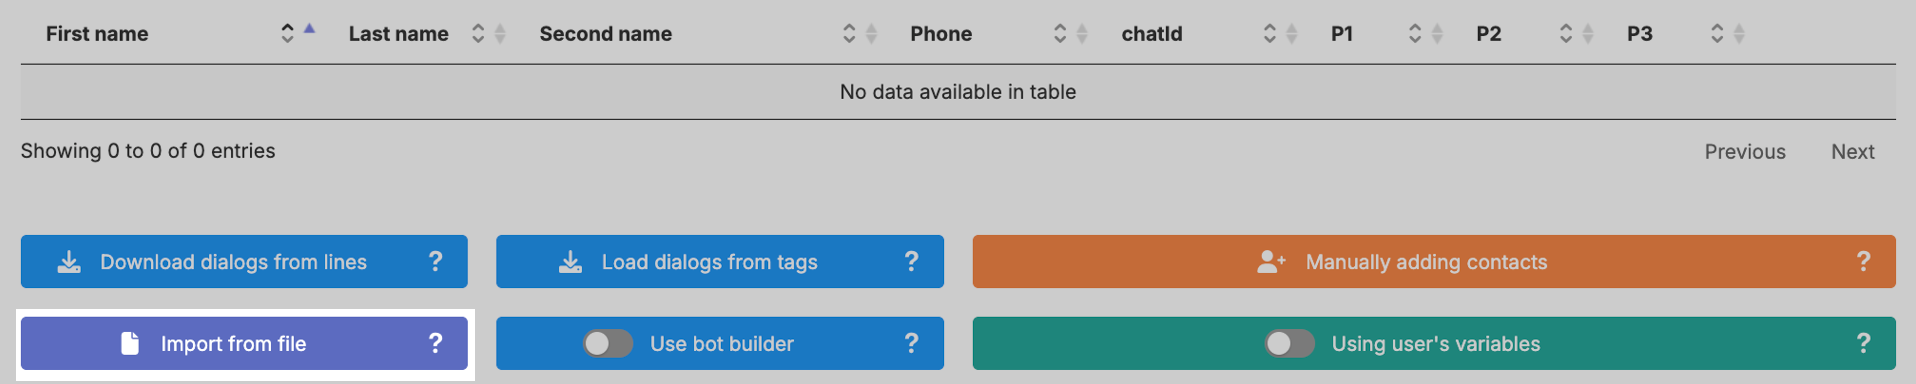
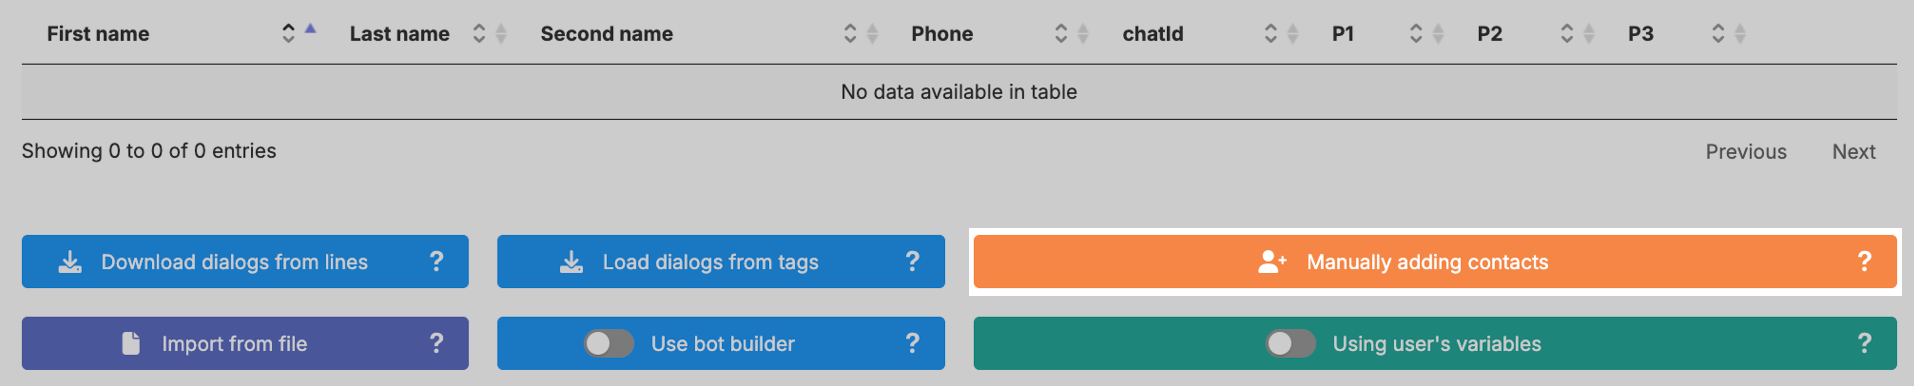
If the contact base is small or you are testing the mailing, you can add numbers manually. Click the “Manual contact entry” button and enter the required phone numbers.
Click “Select template” and choose the required one from the list.
If the template contains an attachment, click “Select file” → upload a file in JPEG or PNG format, up to 60 MB (no more).
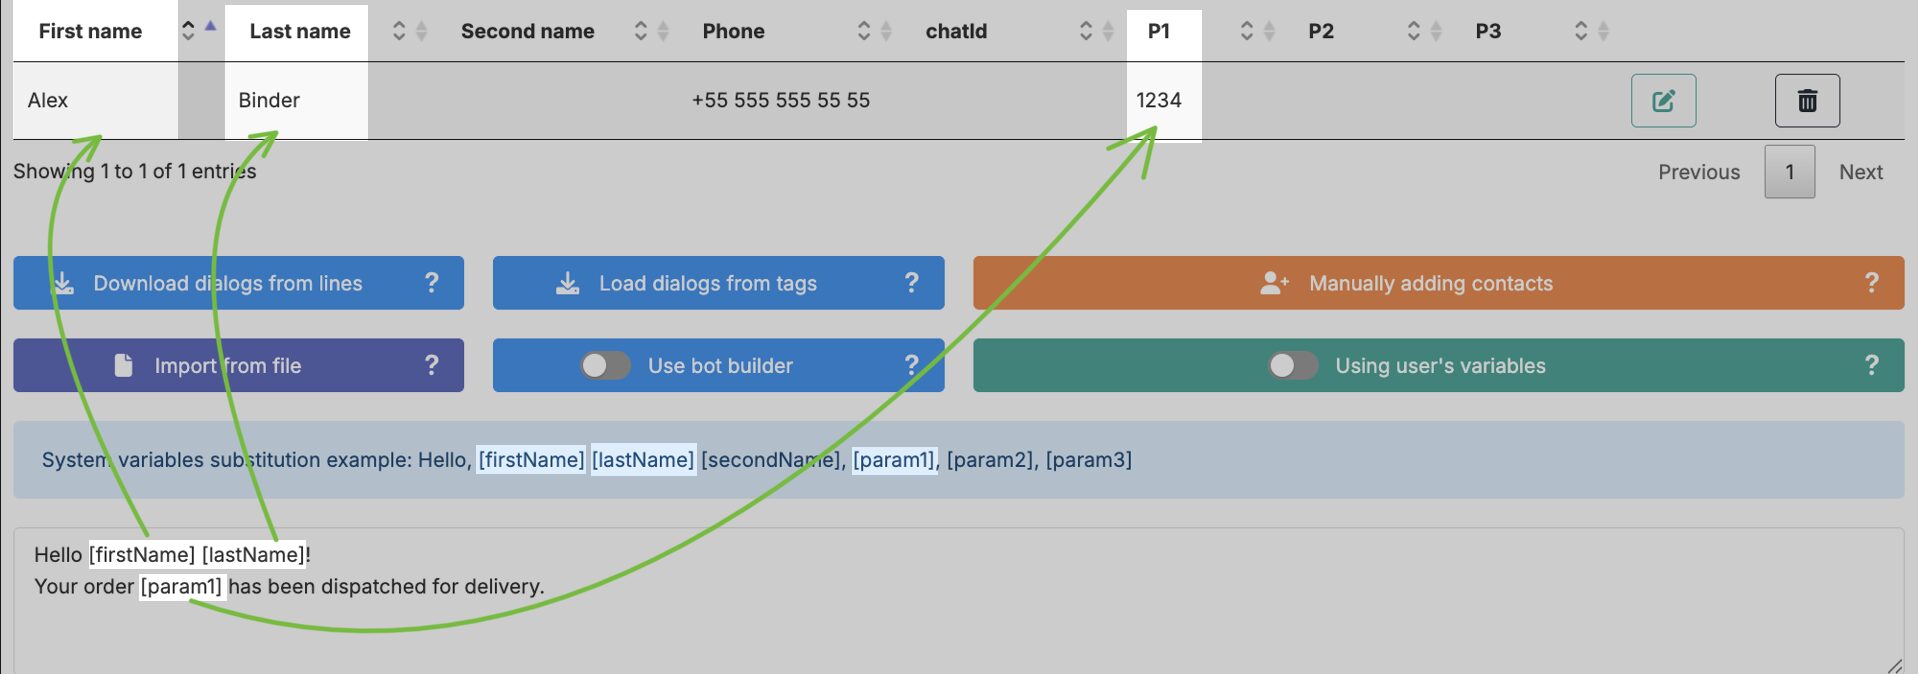
If the template contains variables — specify a value for each variable.
Variables can be:
Enter a value in the variable field.
The variable value will be the same for all recipients.
Copy the required system variable together with the square brackets (as shown in the video) → paste it into the variable field. When sending the mailing, the system will pull data from the corresponding column of the contact table.
• [firstName] — takes the value from the “First Name” column
• [lastName] — takes the value from the “Last Name” column
• [secondName] — takes the value from the “Middle Name” column
• [param1] — takes the value from the “P1” column
• [param2] — takes the value from the “P2” column
• [param3] — takes the value from the “P3” column
To launch the mailing, click the status “Ready to launch” → “Start mailing.” The mailing will begin according to the specified parameters.

While sending is in progress, let’s review the remaining control elements.
The “Edit mailing” button allows you to change previously set parameters and save the updated version.

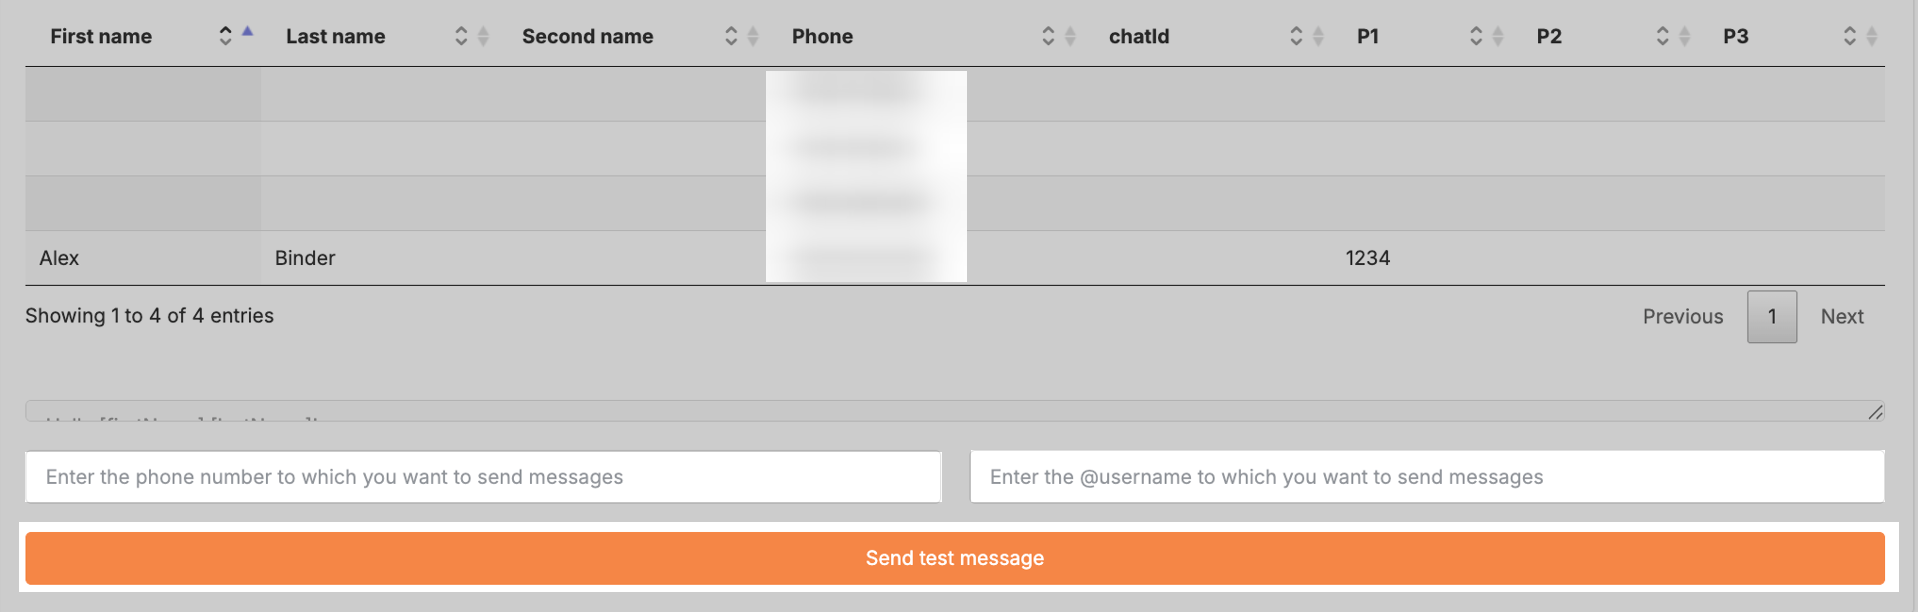
The “View mailing” button shows the current settings and the contact list. Here you can send a test message to yourself to see how the mailing message will appear to the client.
At the bottom of the page, enter a phone number or username and click “Send test message.”

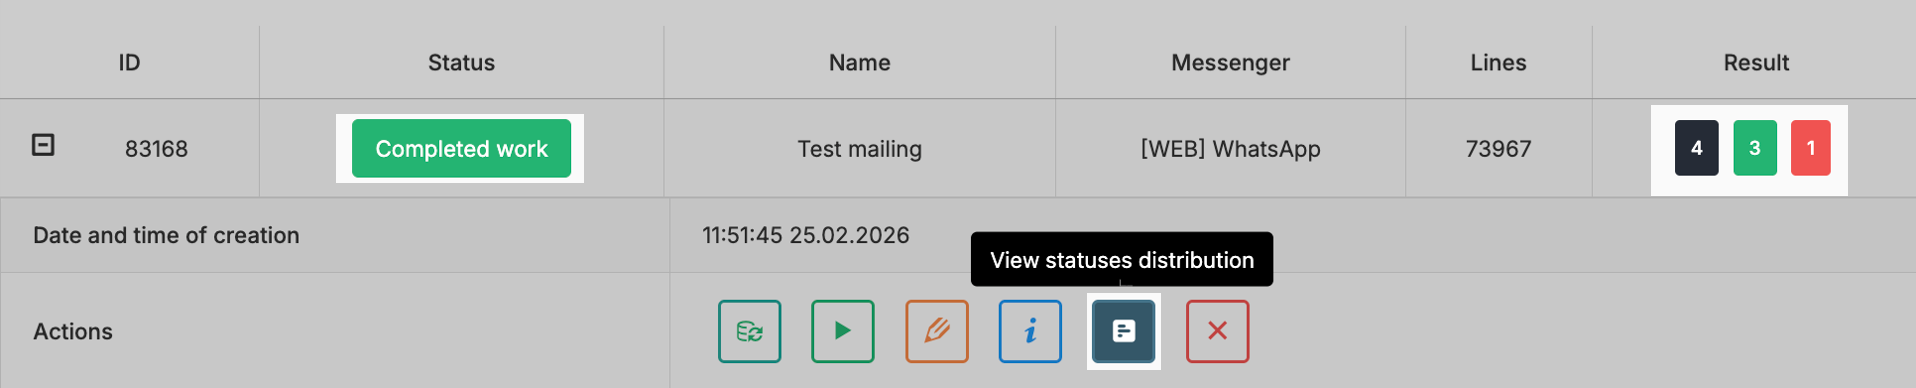
The “View mailing statuses” button displays the mailing report.

The “Delete mailing” button completely removes it from the mailing list without the possibility of recovery.
If necessary, a launched mailing can be stopped. In the mailing list, click “In progress” → “Pause mailing.” To continue sending, click “Start.”

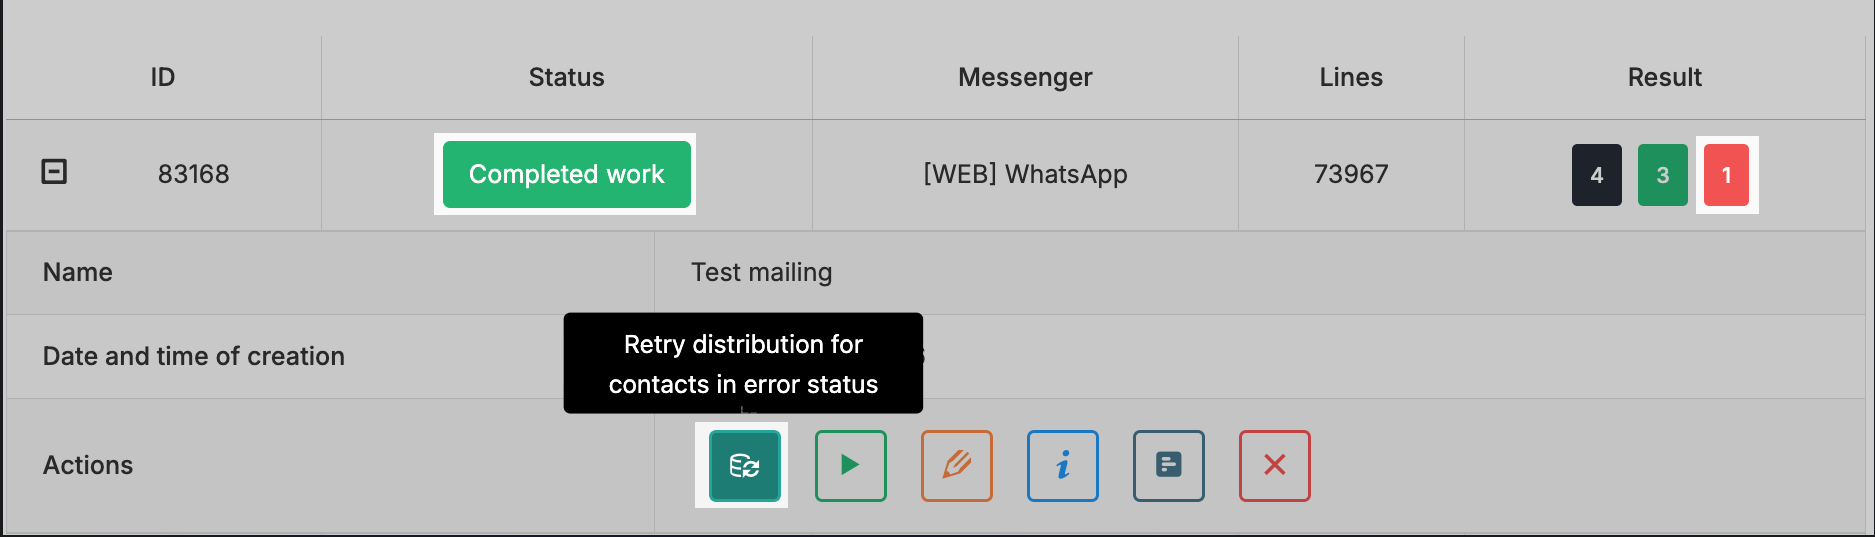
Resend to contacts with the “Error” status.
Go to the mailing list → click “Repeat mailing for contacts with error status.” The system will resend messages only to contacts with the “Error” status.
Resend to contacts with the “Not sent” status.
Go to the mailing list → click “Start for not sent.” The system will start the mailing only for contacts for whom the mailing was not sent.
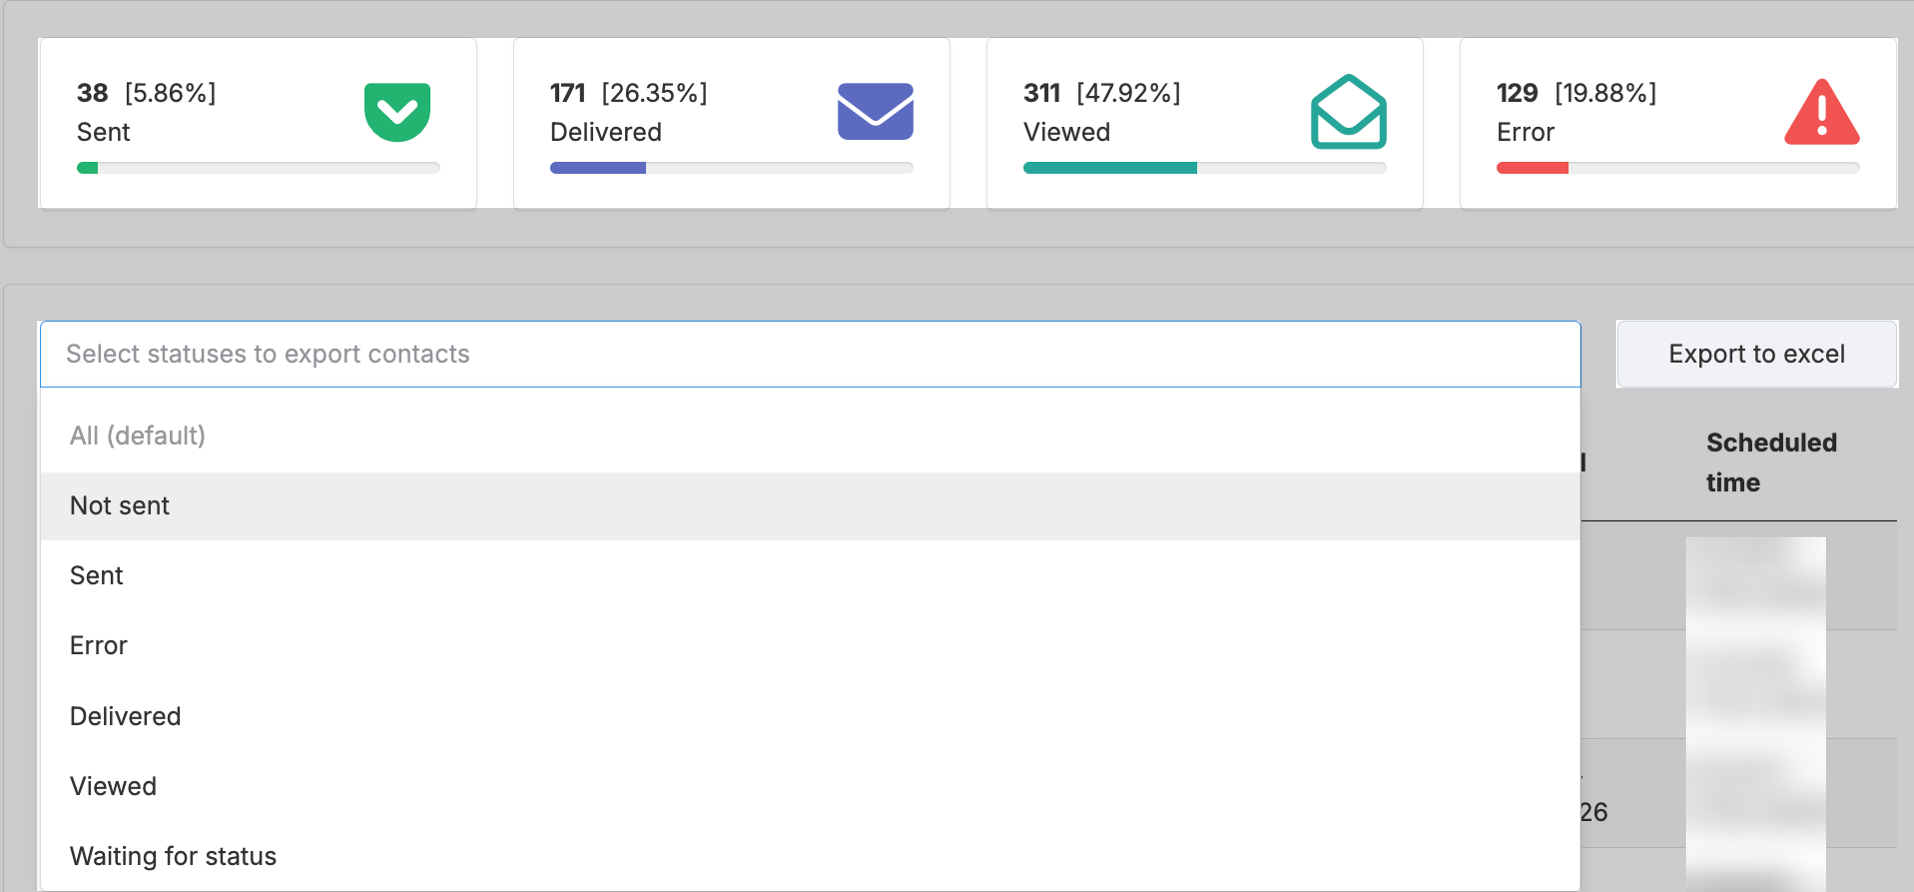
In the mailing list, in the “Result” section, the total number of contacts, the number of successfully delivered messages, and the number of failed sends are displayed. Click “View mailing statuses” to view the detailed report.
In the report, contacts can be sorted by status.
You can export the report using the “Export to Excel” button.
For each contact, you can see the actual sending time, delivery time, and message view time.
A message goes through several status stages:
-
Pending — the message is queued.
-
Sent — the message has been sent from the ChatApp service.
-
Delivered — the message has been delivered to the recipient.
-
Viewed — the recipient has opened the message.
-
Error — sending is impossible (for example, the recipient does not have a WhatsApp account). If a contact receives the “Error” status, scroll down the page — the error reason is always indicated there.
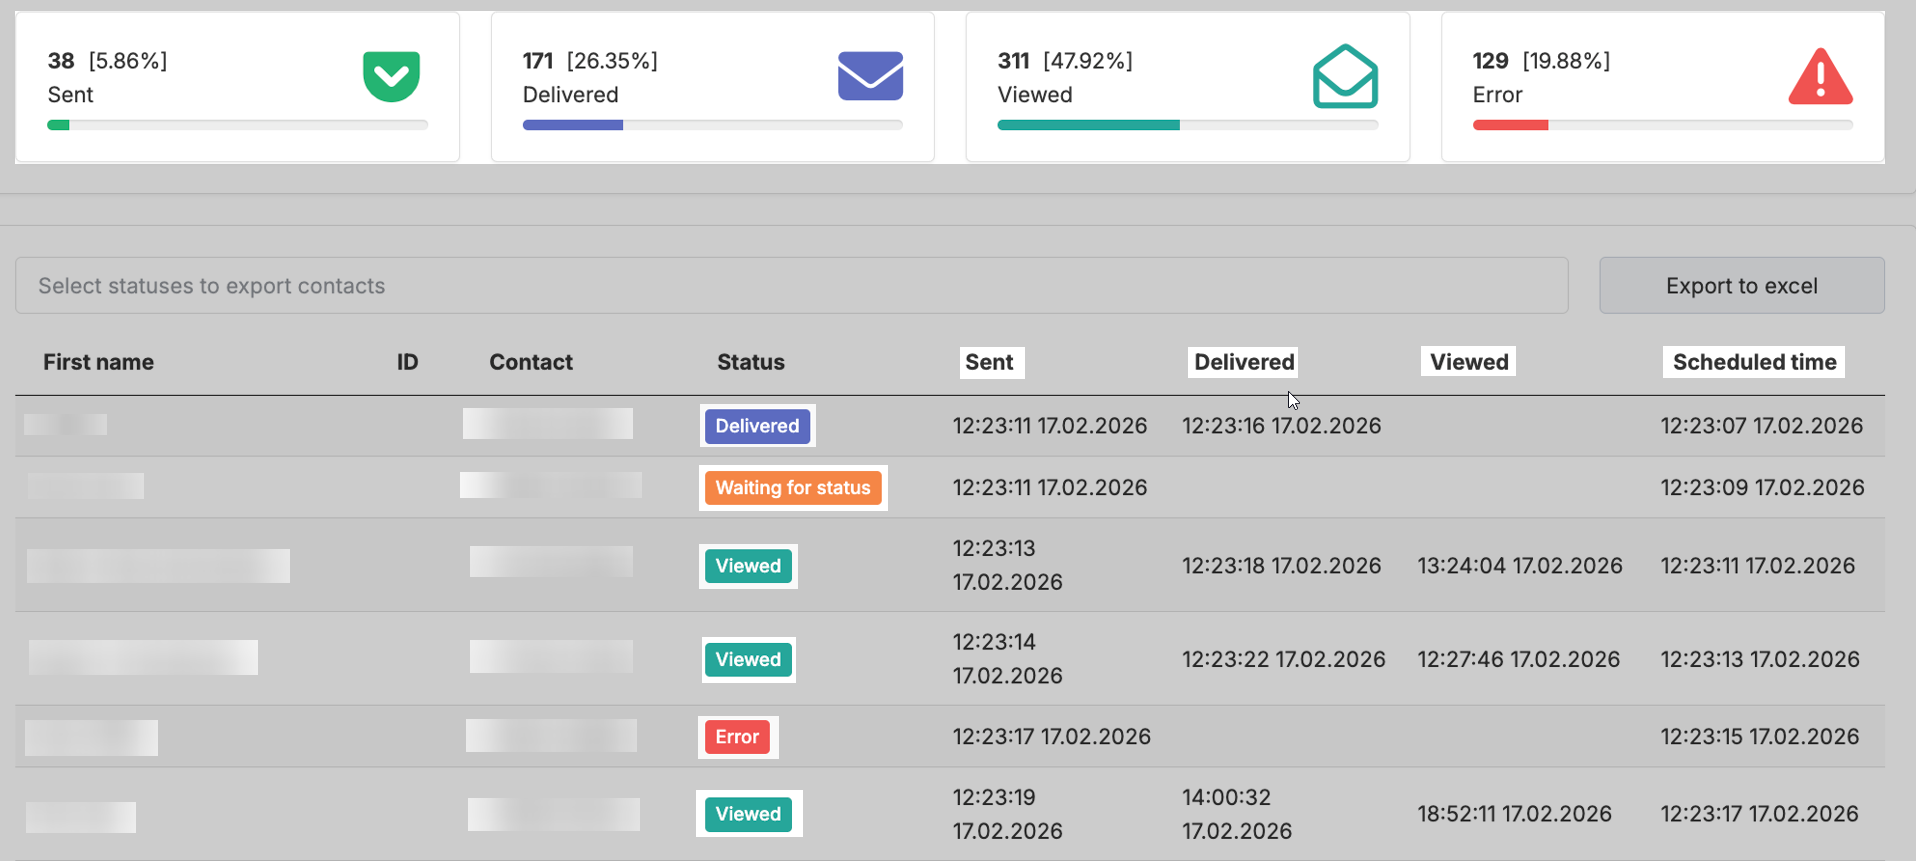
A contact sequentially moves from one status to another:
Sent → Delivered → Viewed or Sent → Error
After transitioning to a new status, the contact disappears from the previous category.
For example, if a message moves from “Sent” to “Delivered,” it will no longer be displayed in the “Sent” section.