

Send a message to the group
The robot sends a text message to a selected group chat.
How to add the ChatApp robot:
Step 1. Go to the “Robots” section in the required CRM funnel.
Step 2. On the stage where the robot should trigger, click “+”.
Step 3. In the left-hand list, scroll down and open the “Other robots” section.
Step 4. Select the robot [ChatApp for WhatsApp, Telegram, Viber] — “Send message to group”.
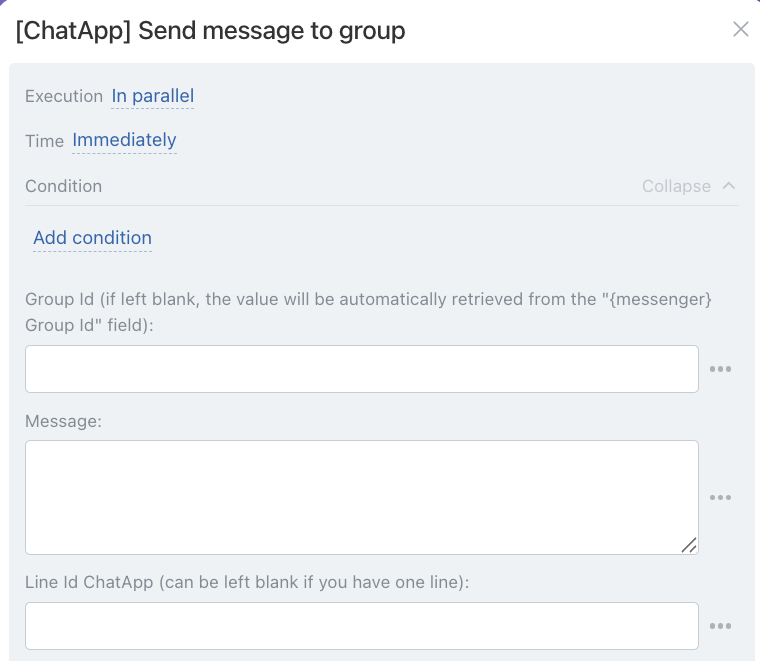
• Independently of other robots — starts immediately (default).
• After the previous robot — starts only after previously configured robots on this stage have completed.
When — the robot trigger moment:
• Immediately — when the card moves to the stage (default).
• After time — delayed start (set interval).
Conditionally — additional conditions for robot execution (if needed).
If the condition is met — the robot will run. If not — the robot will not run.
- To send to a specific group — enter the Group ID from Scenario Dialogs.
Step 1. In Scenario Dialogs, open the required group chat → click the group name.
Step 2. In the left panel under the group name, the Chat ID is displayed. Copy this ID and paste it into the robot’s “Group ID” field.
- If each client has their own group — use the “Messenger” field variable.
In this case, the robot will send the message to the group whose ID is stored in the client’s “Messenger” field.
Variables:
• for lead — {{Messenger (text)}}
• for deal — {{Contact: Messenger (text)}}
In the “Line ID” field, specify the ChatApp line ID.
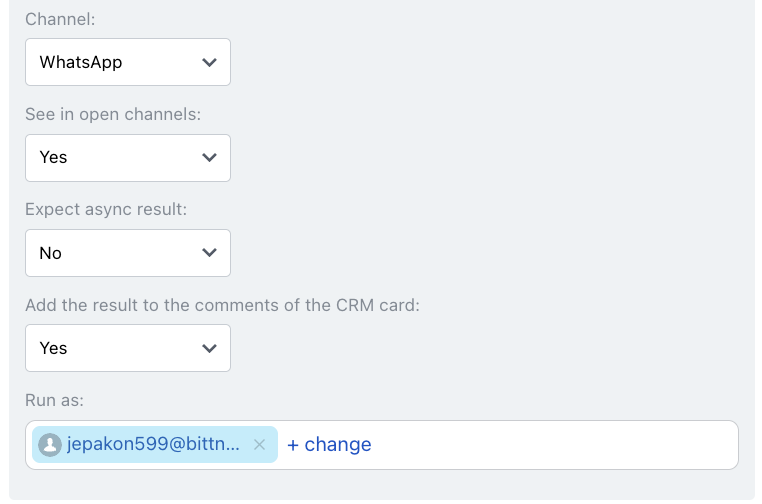
In the “Channel” field, select the communication channel from the line specified in the “Line ID” field.
When enabled, the robot waits for the messenger response and returns the final delivery status. If delivered — success is returned; if not — an error with a reason. This may increase execution time.
To show results in the CRM timeline, set “Add result to CRM comments” to “Yes” or add a Bitrix24 “Add comment” robot after it.
