

Send a WACA template message
The robot sends a template message via WhatsApp Cloud API using a pre-approved template.
How to add the ChatApp robot:
Step 1. Go to the “Robots” section in the required CRM pipeline.
Step 2. At the stage where the robot should be triggered, click “+”.
Step 3. In the left-side list, scroll down and open the “Other robots” section.
Step 4. Select the robot [ChatApp for WhatsApp, Telegram, Viber] — “Send template message WACA”.
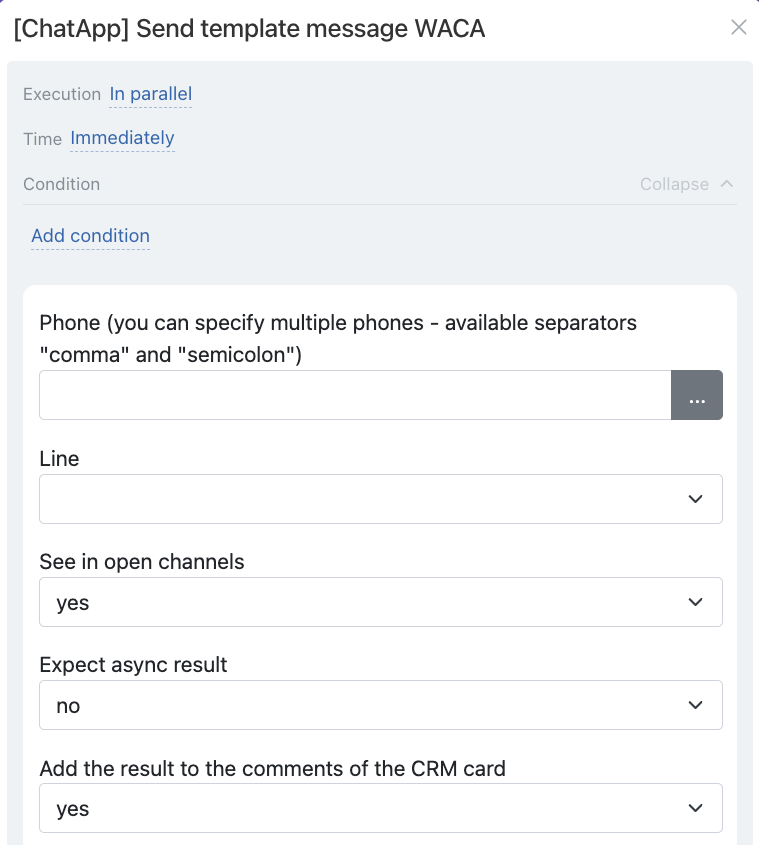
Sequentially — the execution order of the robot at the stage:
• Regardless of other robots — runs immediately (default).
• After the previous robot — runs only after the previously configured robots at this stage are completed.
When — the moment when the robot is triggered:
• Immediately — when the card moves to the stage (default).
• After a delay — delayed execution (specify the time interval).
Condition — additional conditions for running the robot (if needed).
If the condition is met, the robot will run. If not, the robot will not start; подробнее.
Enter the phone number in the “Phone” field — manually or via a variable.
• Manually — specify one or several phone numbers (separated by commas or semicolons).
• Via variable — the number is pulled from the CRM card: click the three dots on the right → select the entity (Lead or Deal) → choose the field where the number is stored.
If numbers are stored in different fields (Mobile, Work, etc.), use:
• for a deal — {{Contact: Phone (text)}}
• for a lead — {{Phone (text)}}
The “Phone (text)” type variable will pull all available numbers from the CRM card.
If multiple numbers are specified in the client card, the message will be sent to each number. To send to a specific number, select the field that stores that exact number.
In the “Line” field, specify the ChatApp line ID where the WhatsApp Cloud API channel is connected.
Determines whether the message sent by the robot will be displayed in the Open Line chat. By default, it is displayed.
The “Wait for asynchronous result” function allows the robot to receive the actual message delivery status from the messenger. Without this function, the robot only shows the “sent” status because the message has only been placed in the sending queue. The message has been sent but may not yet be delivered to the client — for example, if the client is offline.
When this function is enabled, the robot waits for a response from the messenger and returns the result after receiving the actual delivery status. If the message is delivered, the robot returns a successful result; if not, it returns an error with the reason. Therefore, robot execution may take some time.
To display the robot result in the CRM card timeline, set “Add results to CRM card comments” to “Yes”, or add the standard Bitrix24 robot “Add comment to element” after it.
The result of the robot execution is displayed in the timeline section of the CRM card.
In the “Select template” field, choose from the dropdown list the message template that the robot should send.
By default, the user who installed the ChatApp application is specified.
