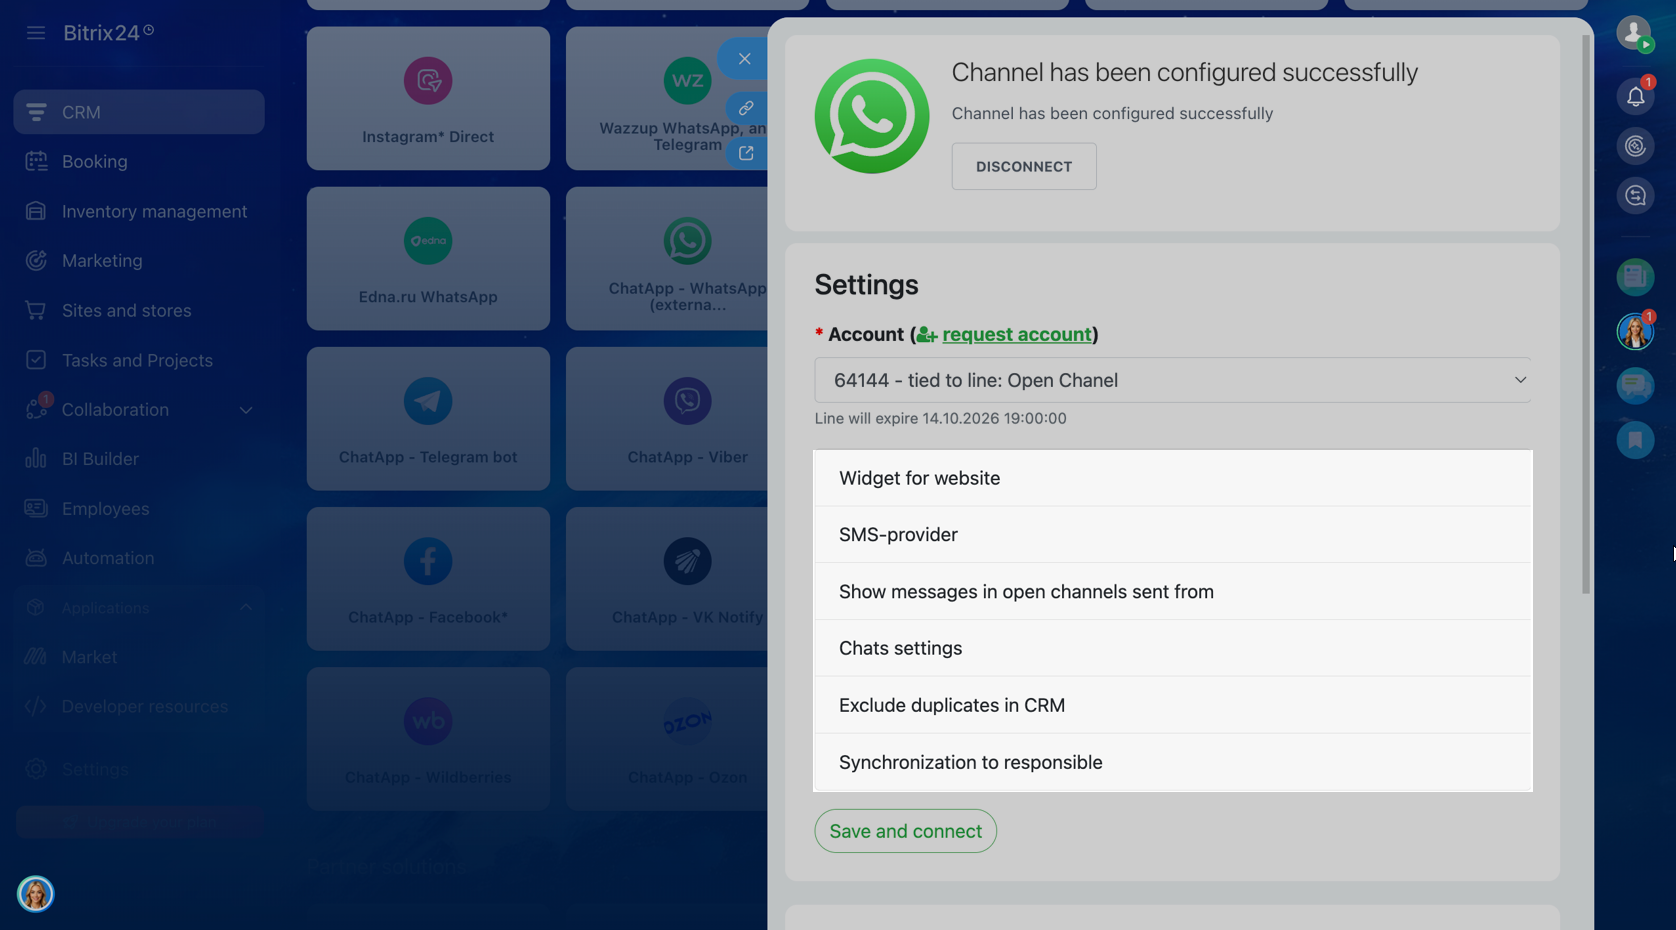
Additional connector features
To use the required Open Line in the Bitrix24 widget:
- In the Contact Center, open the connector “ChatApp — required channel”.
- If multiple Open Lines are connected, select the required one.
- Click “Edit” → open the “Website Widget” section and fill in:
• company phone number — the number used in the widget;
• text parameter — the message that will be prefilled for the client when opening the chat. - Click “Save and Connect”.
If the Bitrix24 widget is already published on the website and connector settings were changed: go to the widget settings → click “Disable”, then “Enable”. Changes are applied within approximately 1 minute.

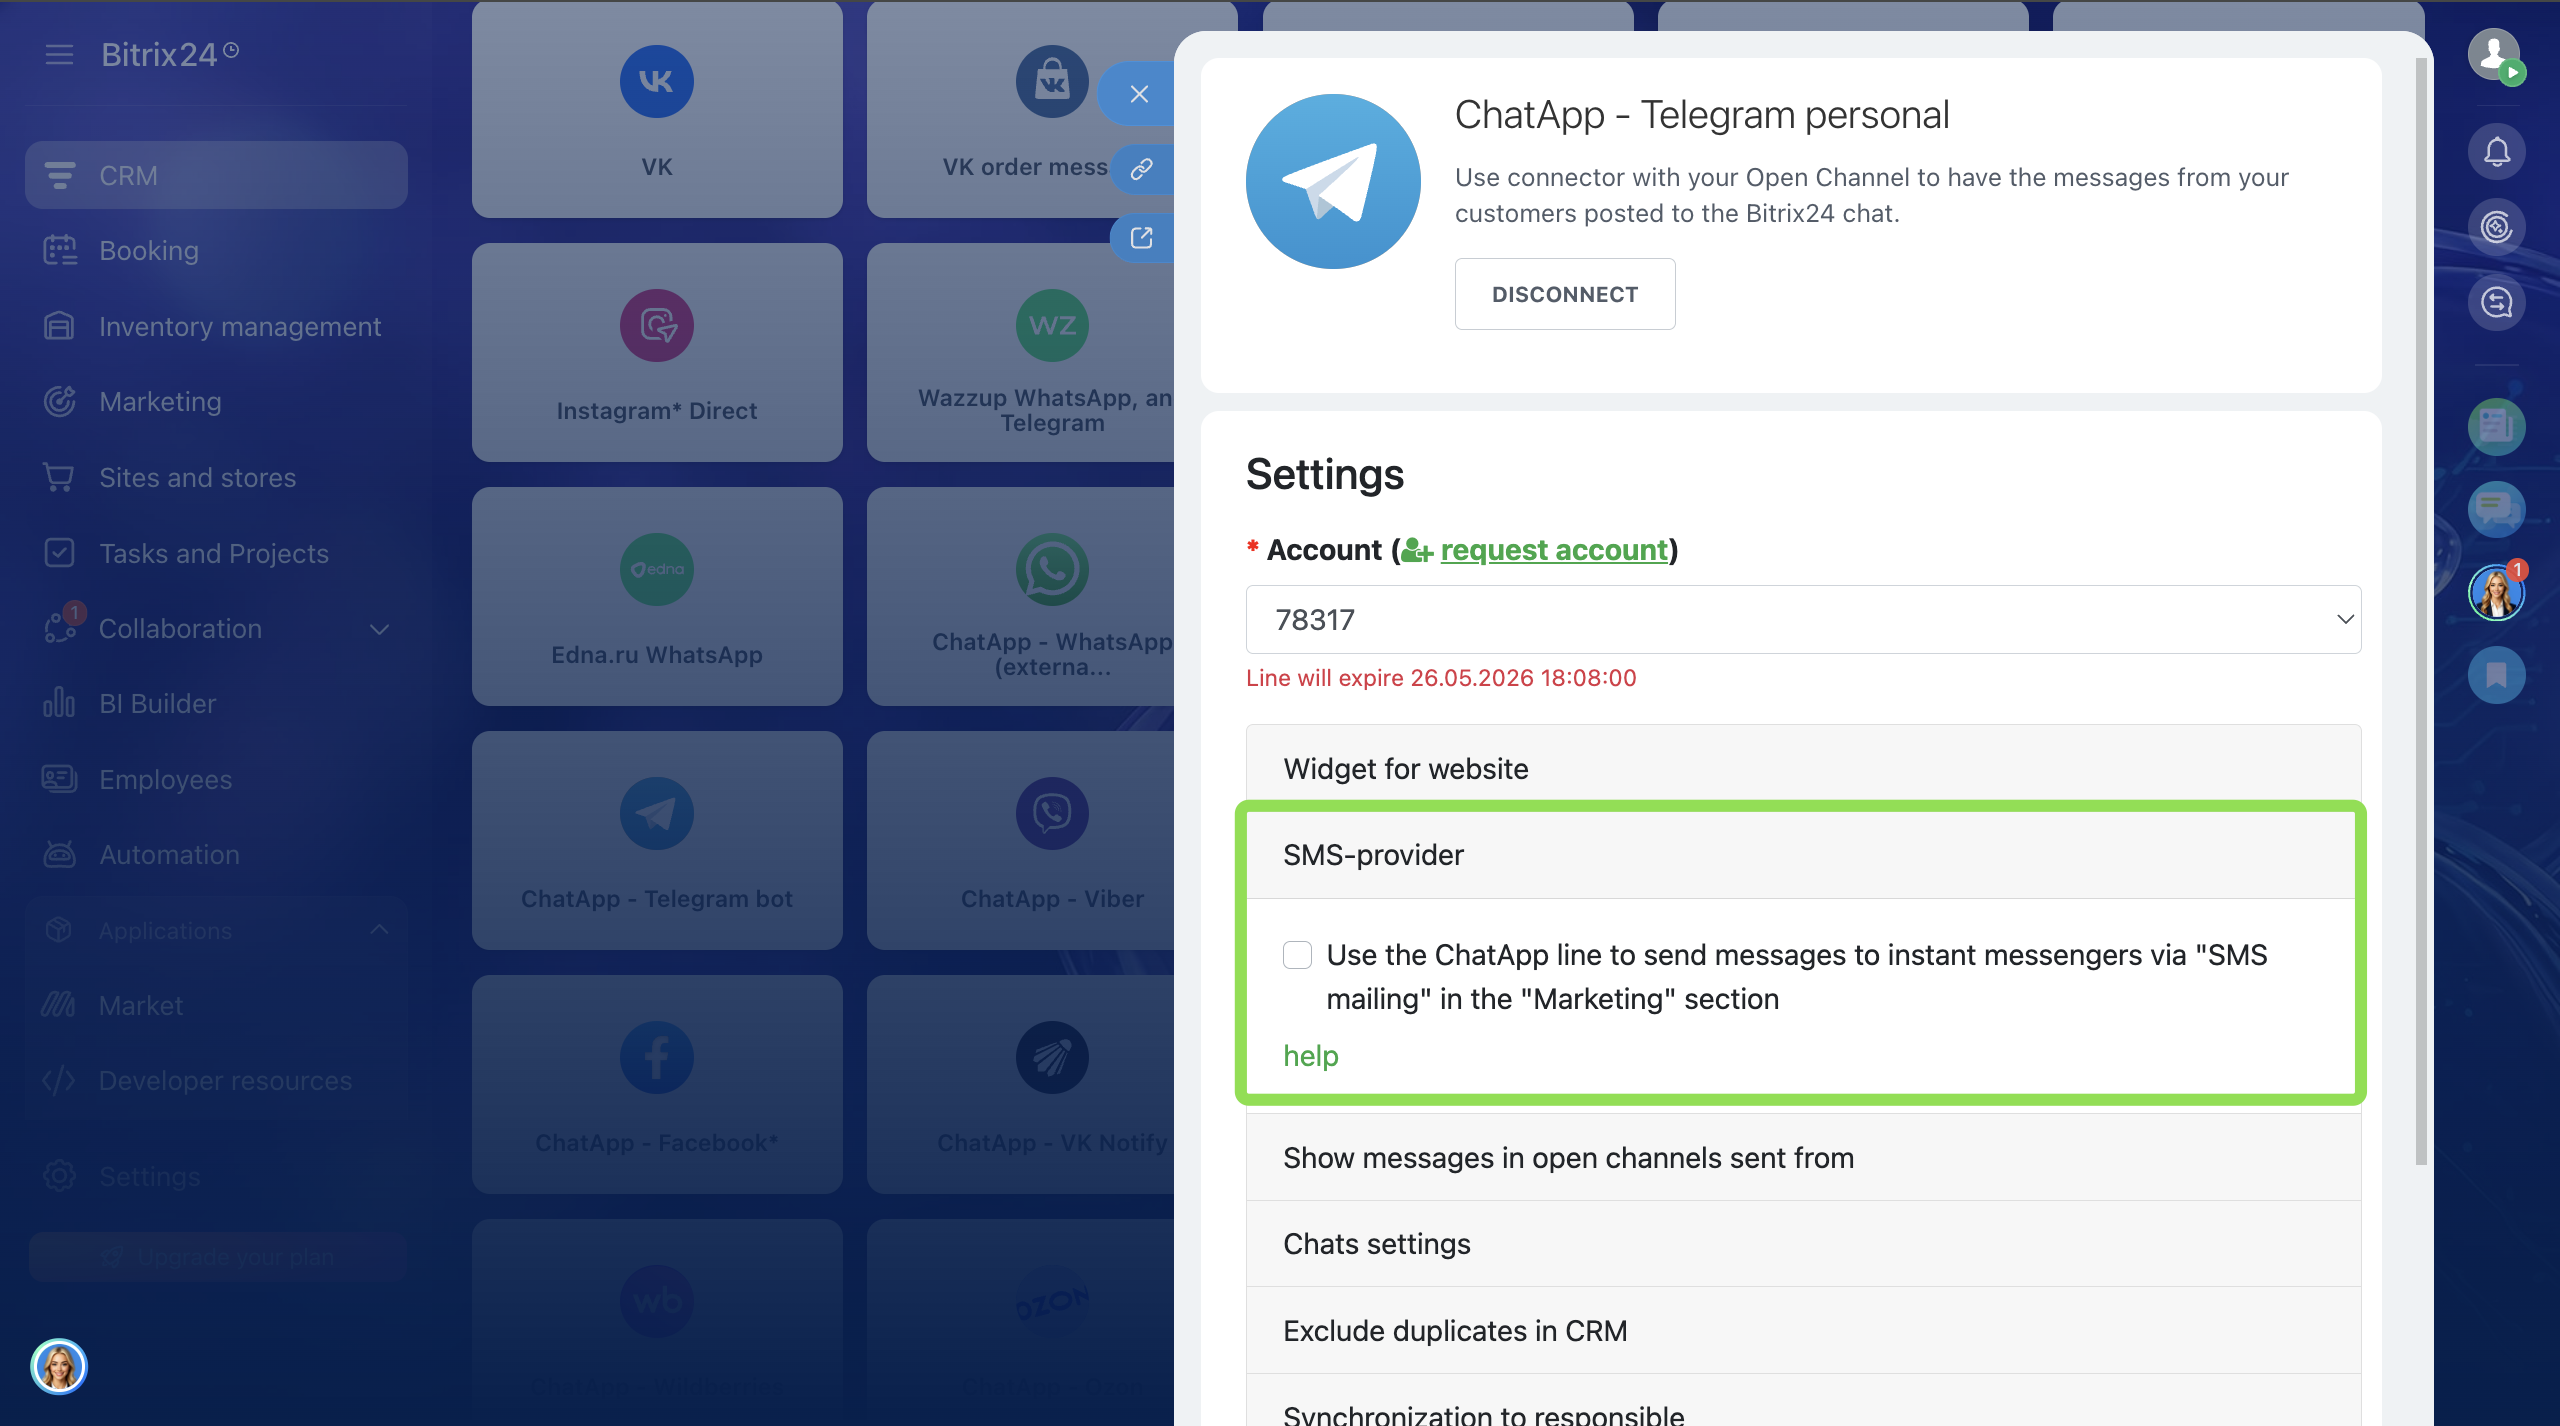
- In the Contact Center, open the connector “ChatApp — required channel”.
- Click “Edit” → open the “SMS Provider” section.
- Enable the option “Use the ChatApp line to send messenger messages via SMS campaigns”.
This option can only be enabled for one Open Line.
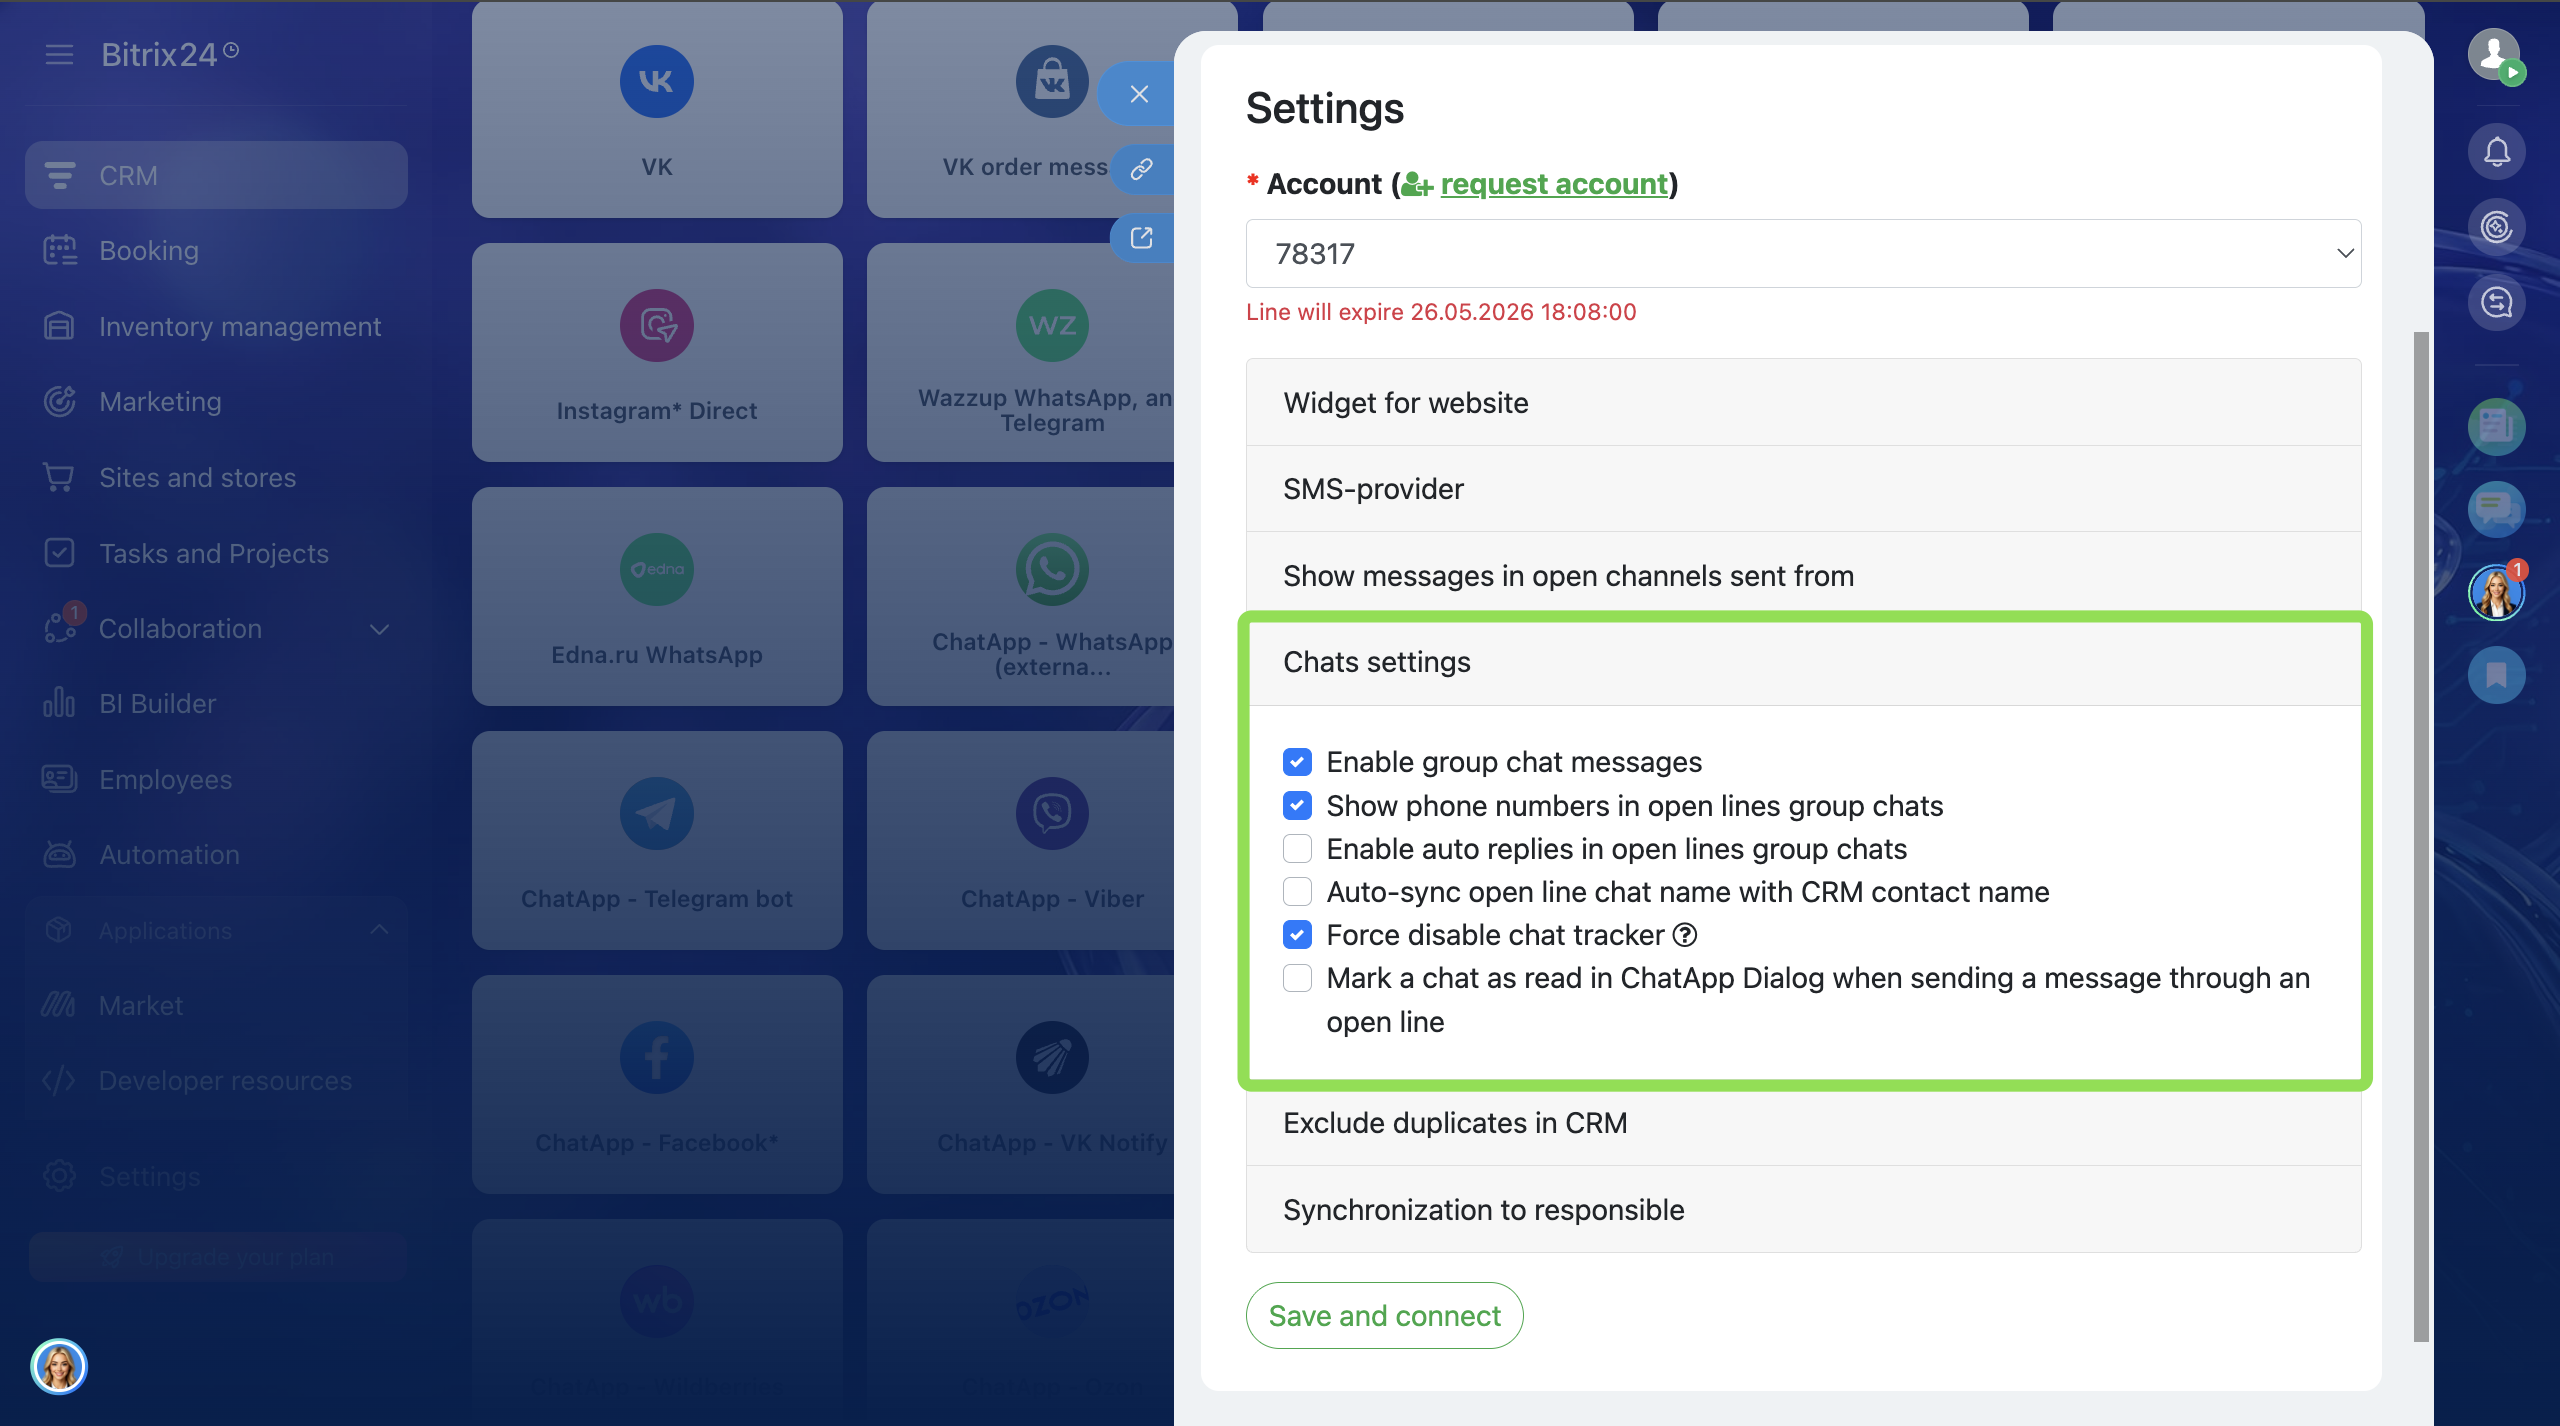
Select the systems whose messages should be displayed in the Open Line chat.
The Open Line chat will display messages sent from:
• ChatApp Dialog — from Scenario Dialogs.
• ChatApp Mobile App — from the ChatApp mobile application.
• Native Messenger App — from the messenger’s native application.
• ChatApp Personal Account — messages from campaigns launched in the ChatApp account.
• amoCRM — from amoCRM if two CRMs are connected simultaneously.
• ChatApp API (your application) — from an application using the ChatApp API.
• ChatApp Bot — from the ChatApp bot.
• Bitrix24 SMS Provider — from the Bitrix24 SMS campaign module.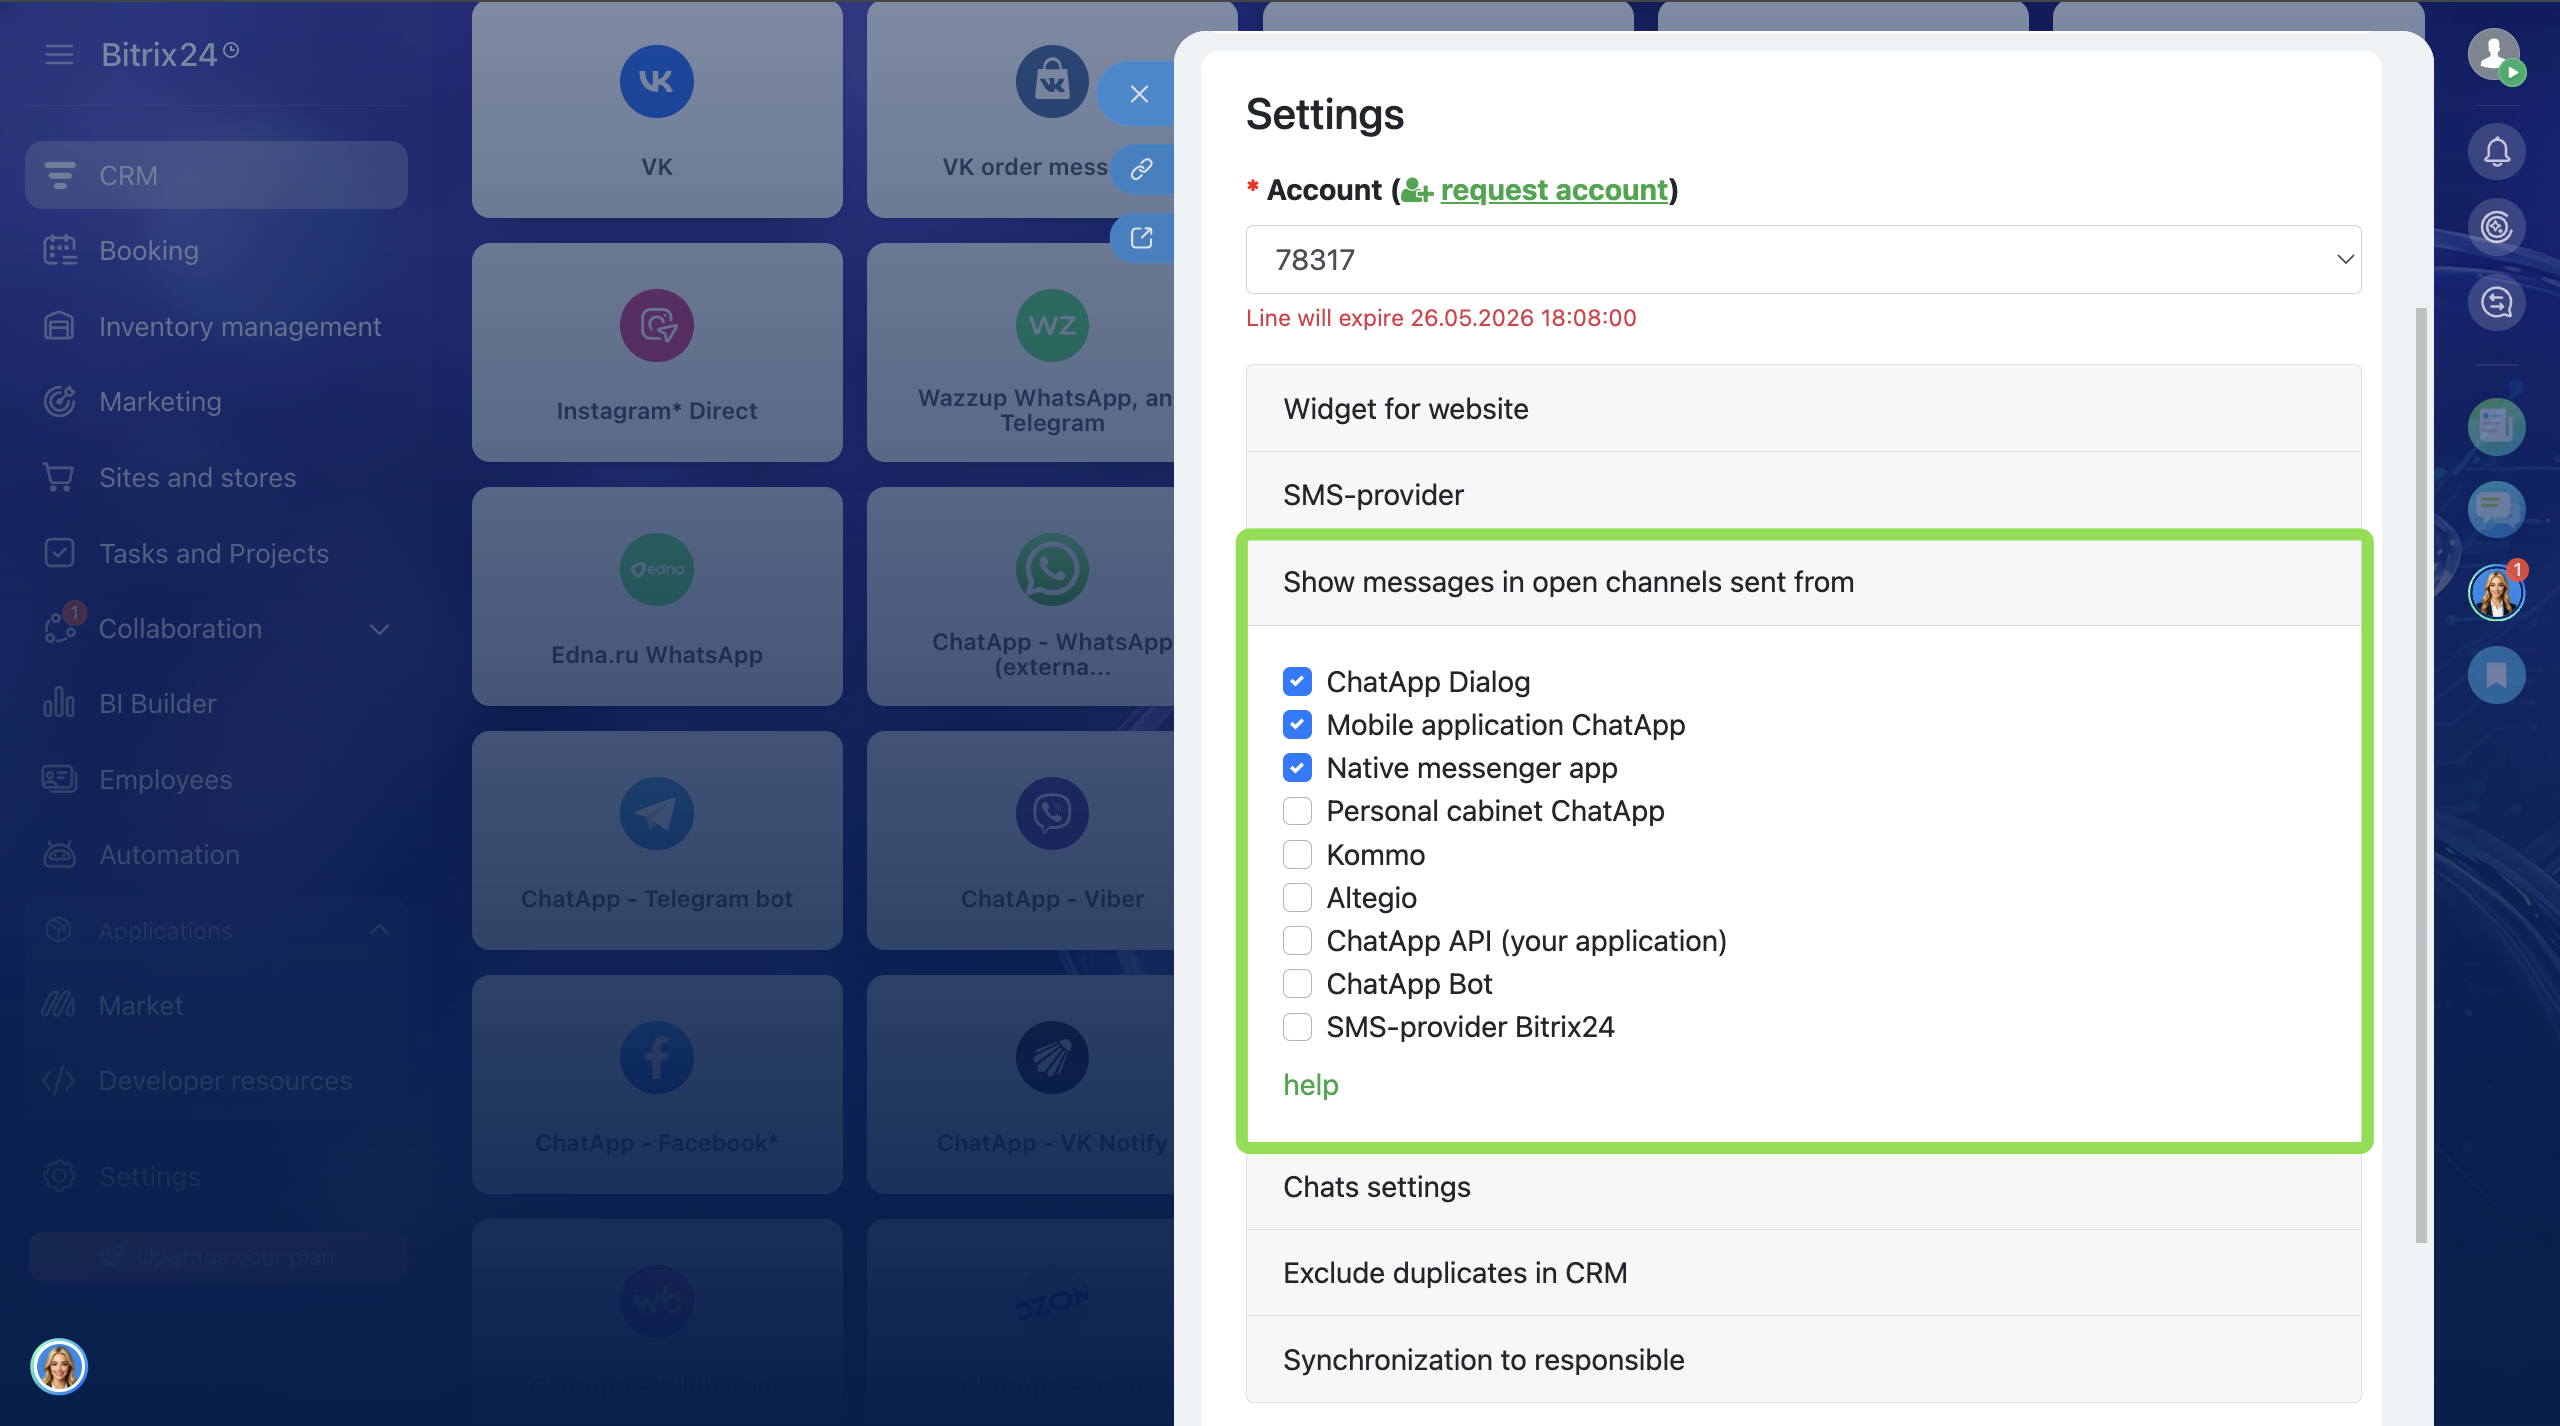
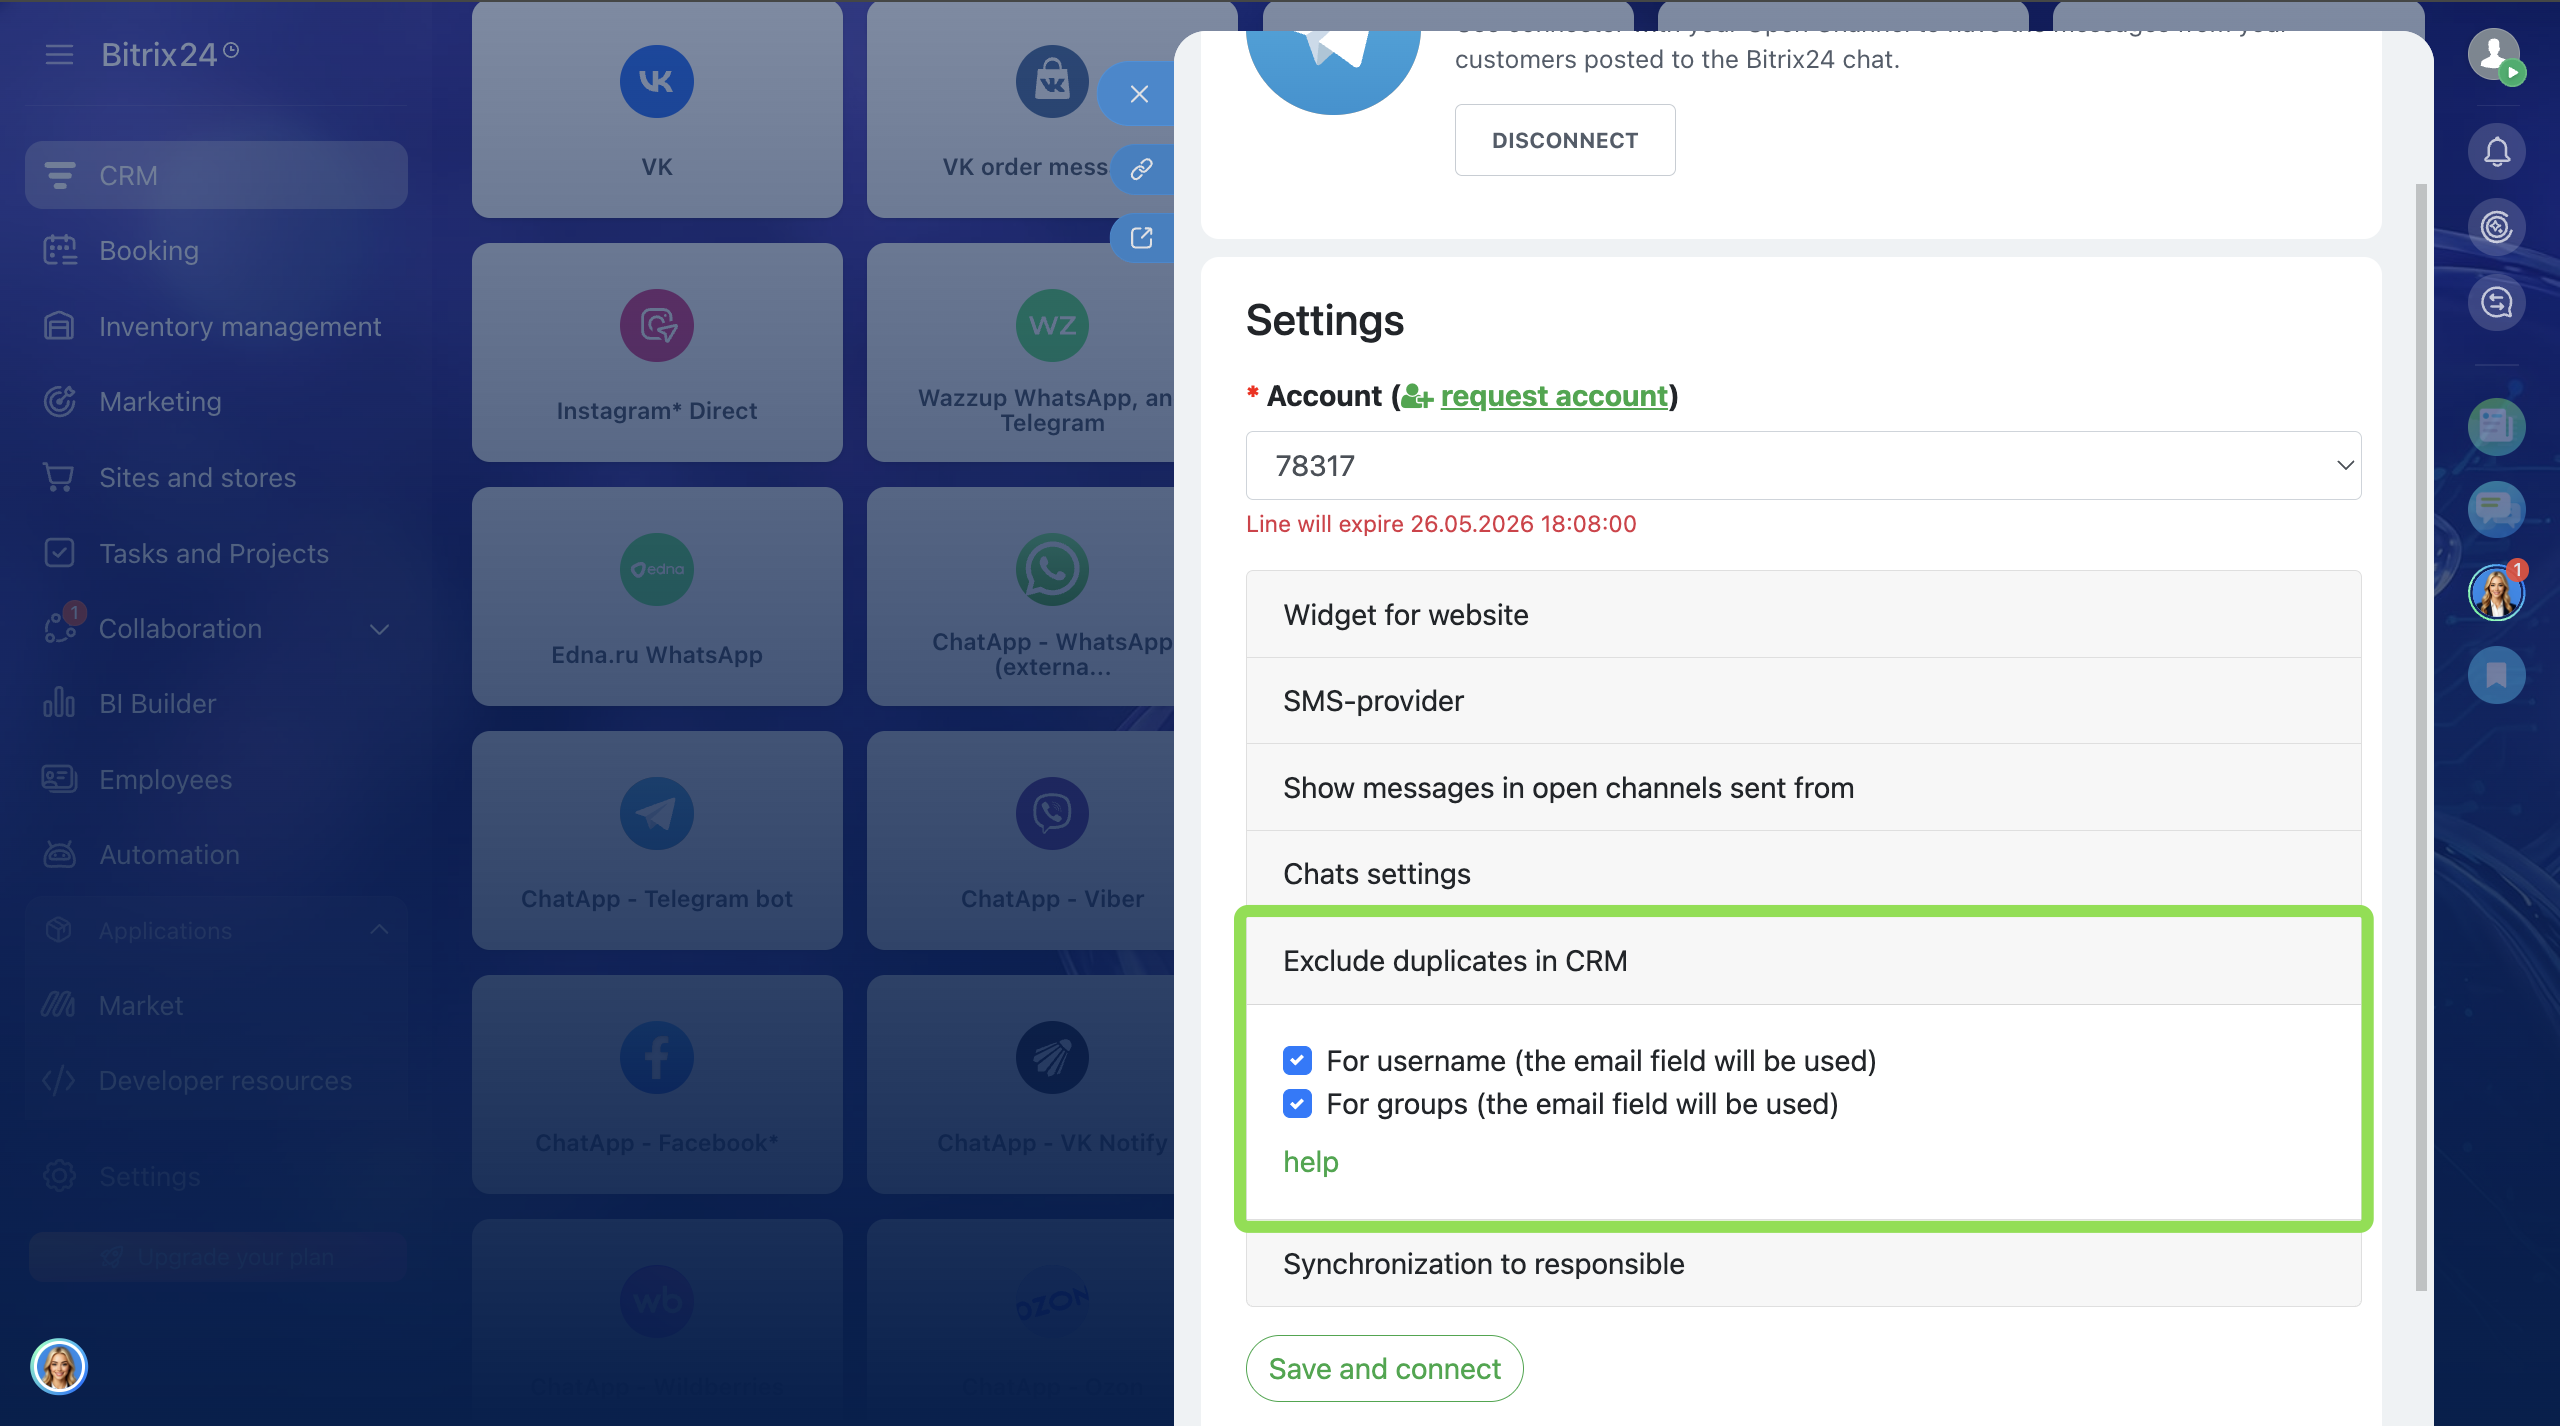
Bitrix24 controls duplicates only using the standard phone and email fields.
ChatApp generates a non-existent email for Telegram contacts because Telegram usernames are not used by the CRM system for duplicate control. To prevent duplicate contacts and leads, ChatApp uses a non-existent email containing the contact’s username, for example:
anton3088@telegram.chatapp.online
Disable the option for the Telegram connector (contacts and groups)
- Go to the Bitrix24 Contact Center and select the connector “ChatApp – Telegram personal”.
- In the channel settings window, click the “Edit” button.
- In the “Exclude duplicates in CRM” field, select the required options.
Disable the option for the WhatsApp connector (groups)
To prevent duplicate leads and contacts, use a non-existent email with the group ID, for example:
group-766680019@telegram.chatapp.online
In this case, duplicate leads and contacts will not be created.
- Go to the Bitrix24 Contact Center and select the connector “ChatApp – WhatsApp (external provider)”.
- In the channel settings window, click the “Edit” button.
- In the “Exclude duplicates in CRM” field, select the required option.
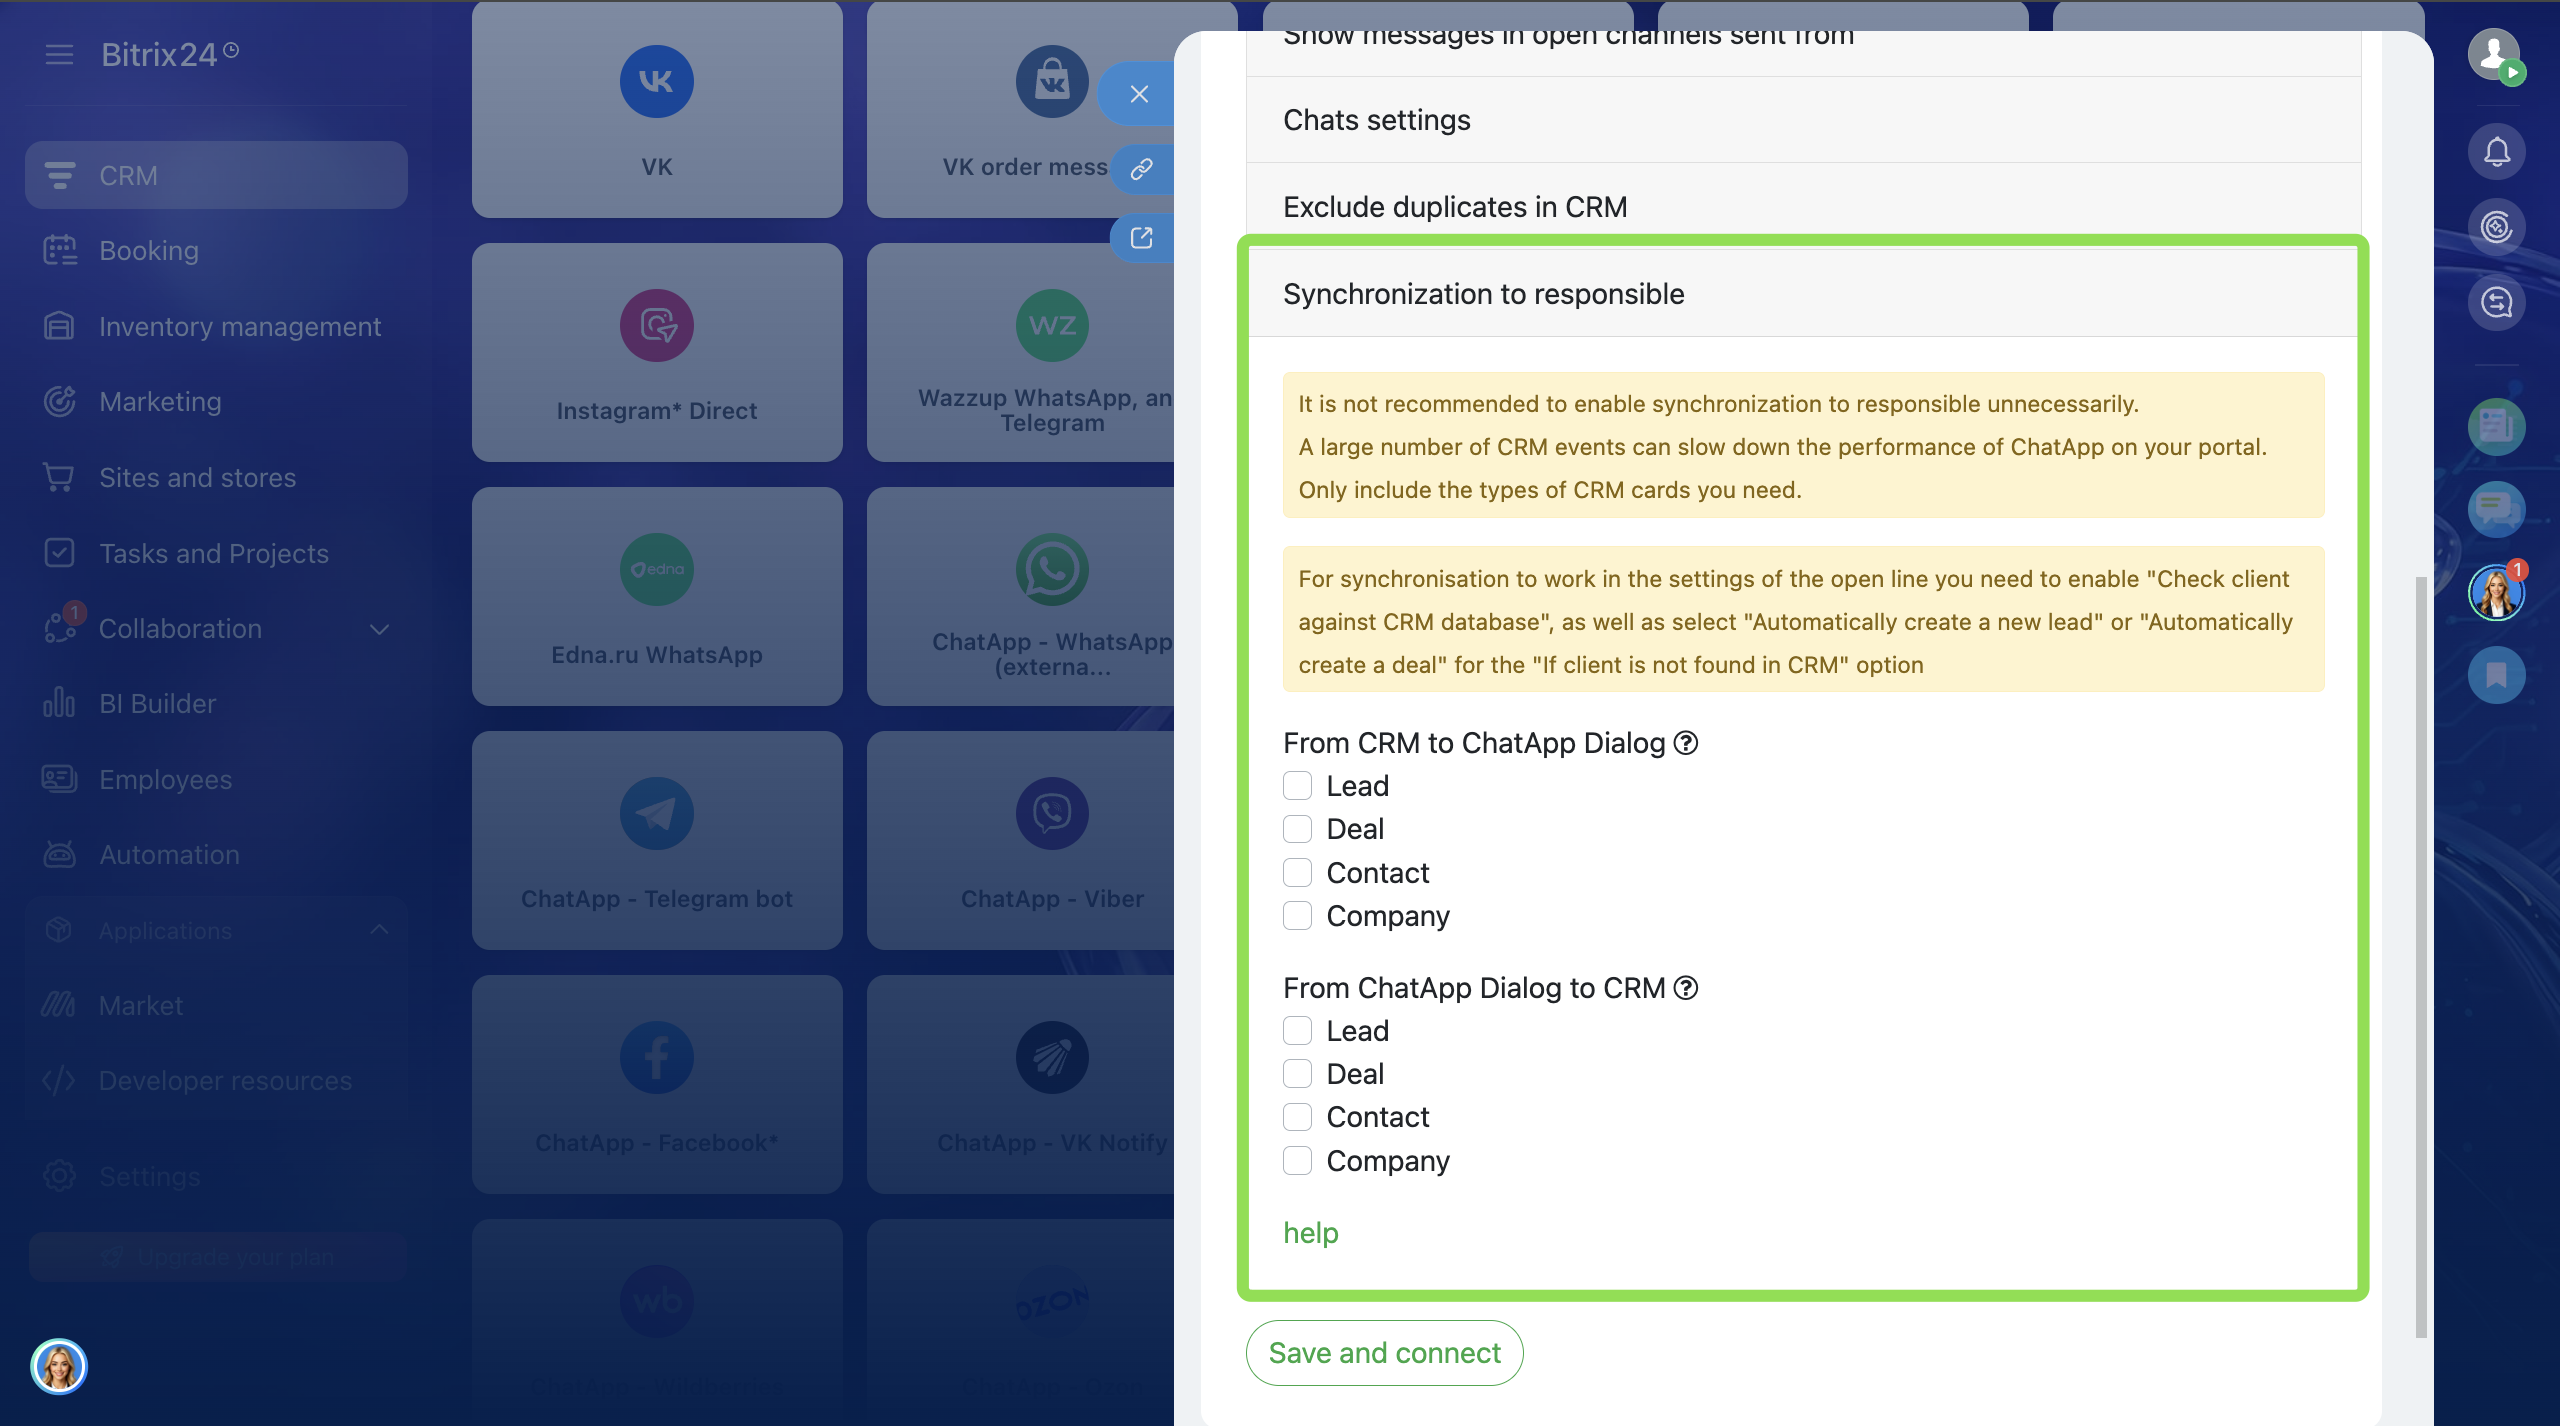
This is needed so that:
— the manager responsible for the client in the CRM also handles communication with them;
— when the responsible person changes, the chat is automatically reassigned to the correct manager;
— there is no need to manually change responsible persons in both the CRM and chats;
— it is easy to track which manager is handling the client and communicating with them.
Responsible persons can be synchronized either from Scenario Dialogs to Bitrix24 or from Bitrix24 to Scenario Dialogs — depending on where managers are assigned.
Step 2. If employees are not invited to the ChatApp account, add them according to the instructions.
Step 3. In the ChatApp account, go to the “Employees” section → click on an employee → in the “CRM Employee” field select the corresponding Bitrix24 employee from the list.
This creates a link between the ChatApp employee and the Bitrix24 employee.
Step 4. In the portal, go to Contact Center → select the connected ChatApp connector → click “Edit” → go to the “Responsible Person Synchronization” section → select the synchronization direction:
— if chats are distributed between managers in Scenario Dialogs, select
“Synchronization from Scenario Dialogs to Bitrix24”.
— if responsible persons are assigned in Bitrix24, select
“Synchronization from Bitrix24 to Scenario Dialogs”.