Setting up Open Chanels
In the Contact Center → open the ChatApp connector for the required channel → in the “Open Line and Access Permissions Settings” section, the open line name is displayed in the “Open Line” field.
If there are multiple open lines, click the “Open Line” field and select the required one from the list → click “Configure” to open the open line settings.
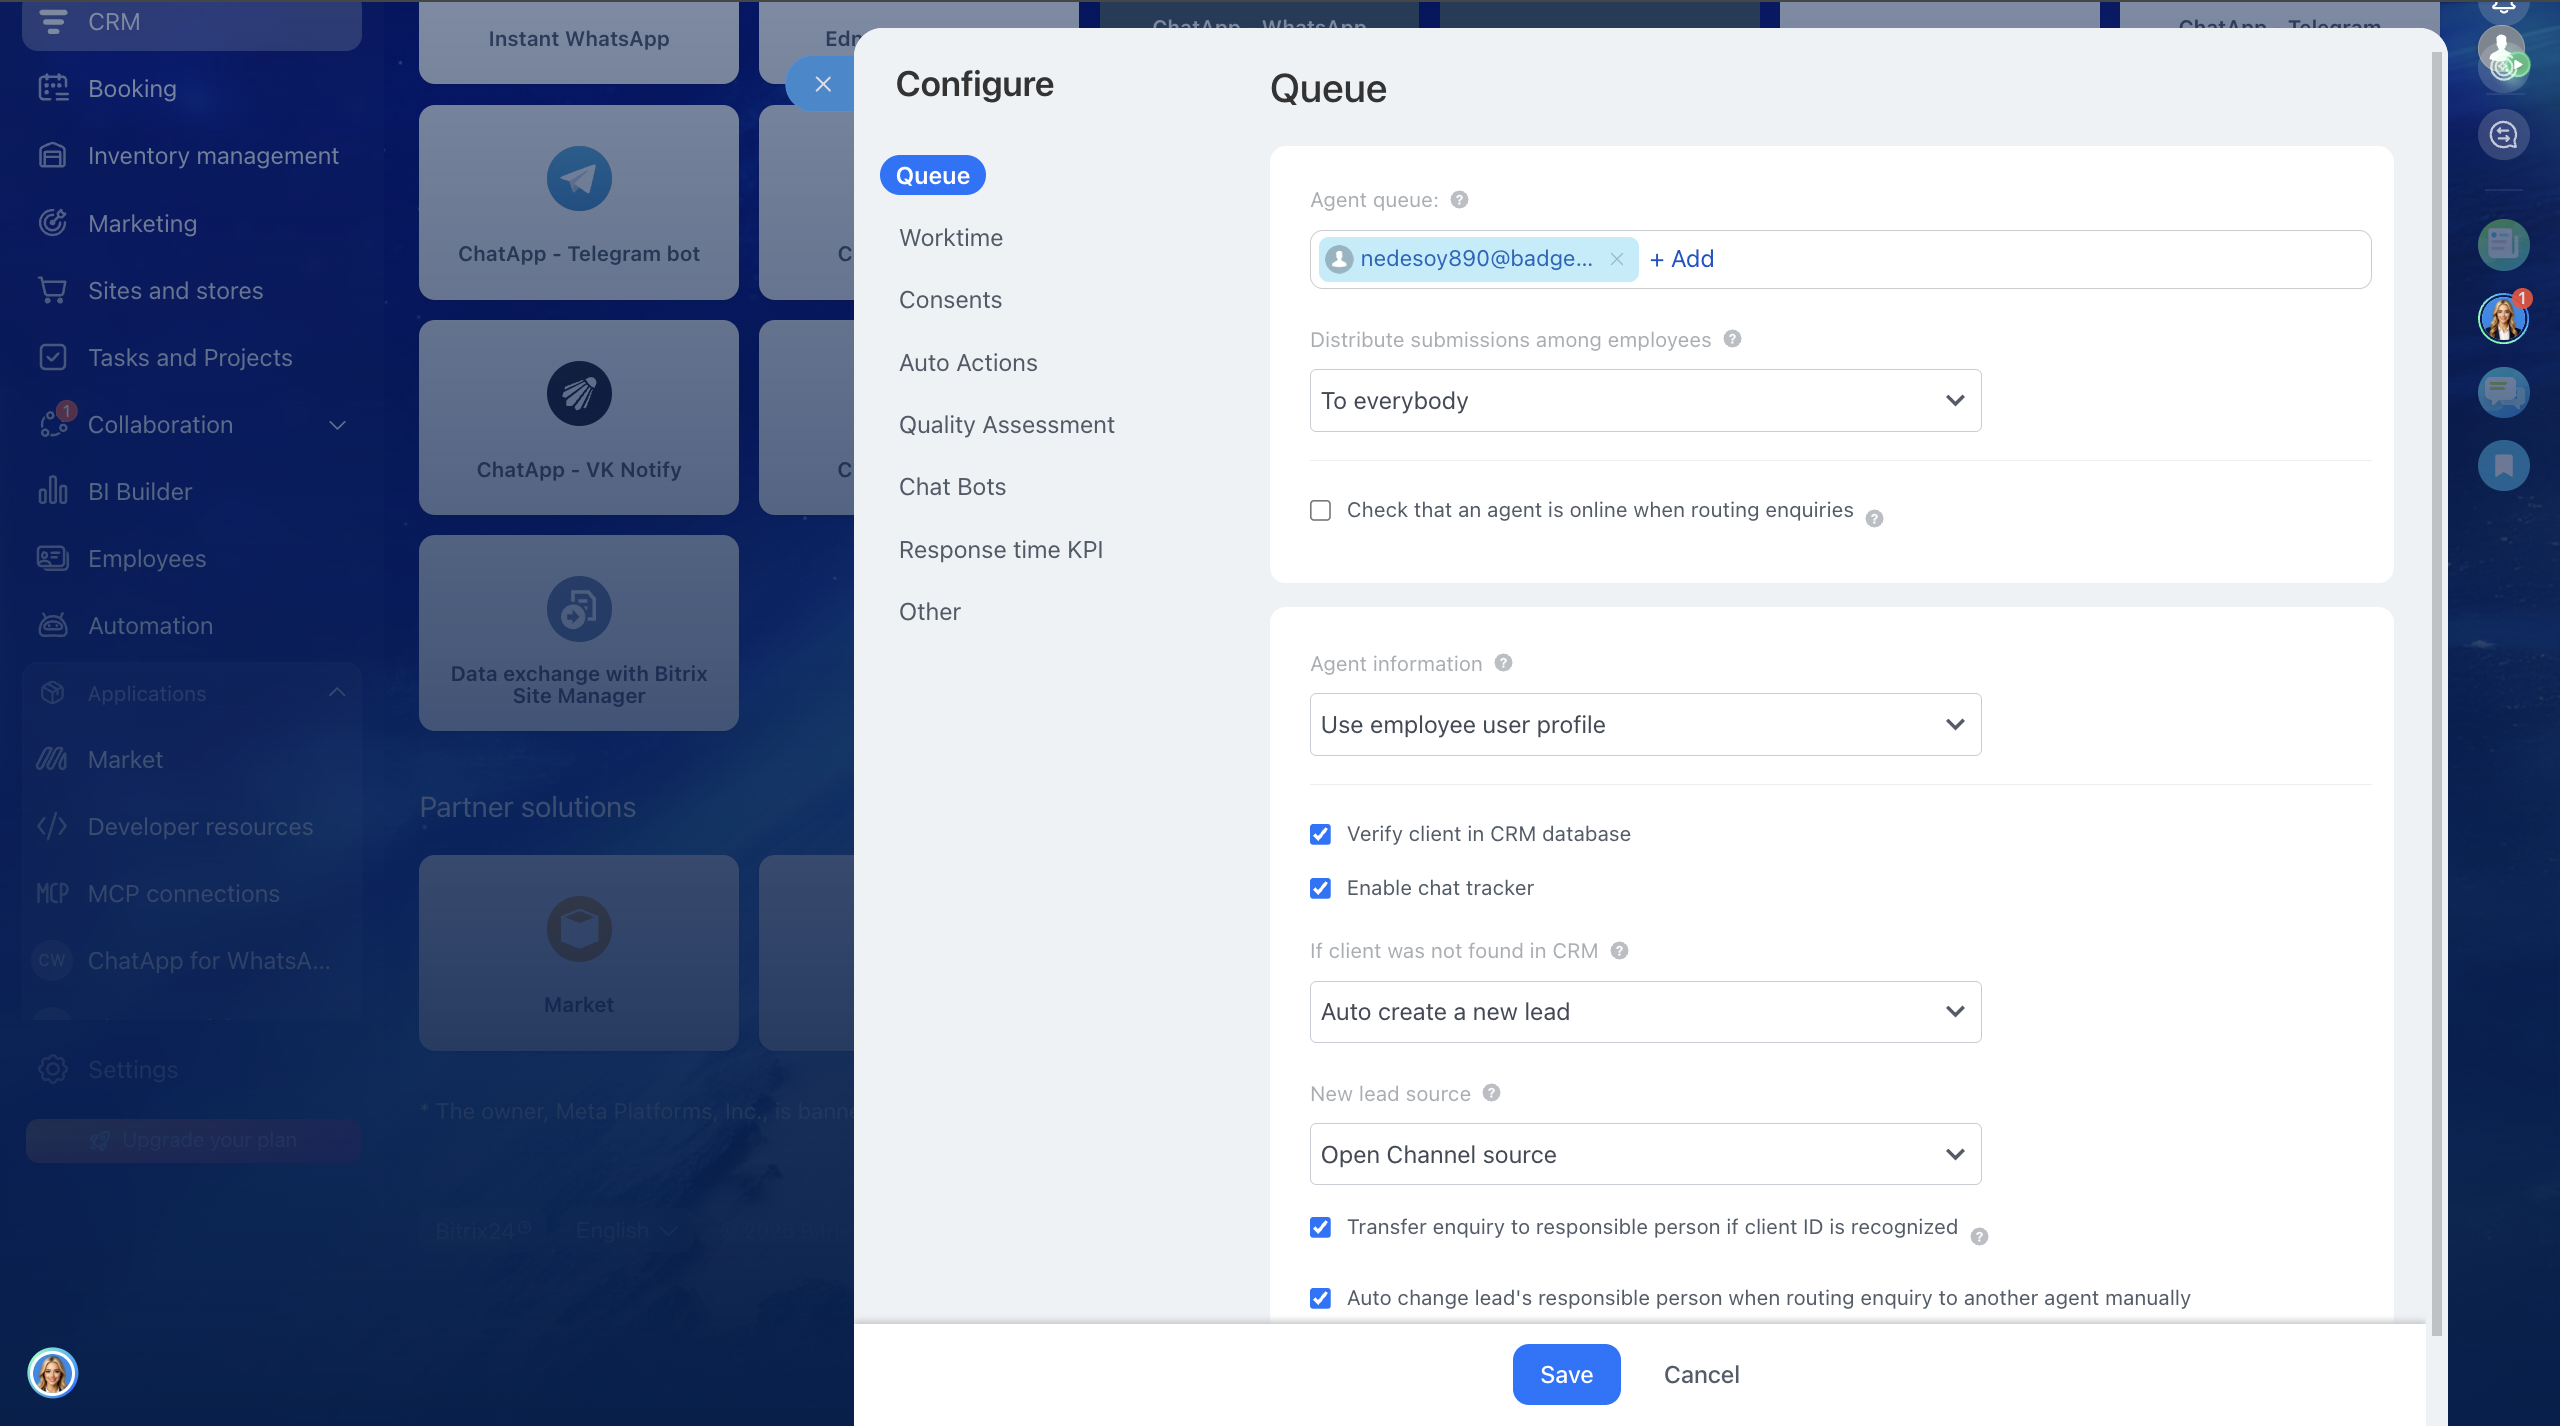
Responsible employees queue — specify the employees who will handle incoming requests.
Request distribution among employees in the queue — select the request distribution method:
• Evenly — requests are distributed evenly among employees in the queue.
• Strictly in order — requests are assigned to the first employee in the list, and if they do not respond, to the next one.
• Simultaneously to everyone — the request is assigned to all employees in the queue, and any of them can take it into work, more details.
Check operator availability when distributing requests — if the option is enabled, the request will be assigned to an operator who has started their working day (if worktime tracking is enabled on the portal) or is online in Bitrix24. If the operator is unavailable, they will not receive incoming requests, more details.
Information about operators in the queue — choose which data the client will see:
• Display information from employee profiles — first name, last name, photo.
• Replace operator data for open lines — specify a different name and photo.
• Hide operator information — display only a name or leave the field empty.
Check client against CRM database — helps avoid duplicate client data.
Enable chat tracker — saves chat history in the client card, even if the client writes from different channels, more details.
If the client is not found in the CRM — select how to create a CRM record:
• Automatically — a lead or deal is created. (A lead is created if contact details are available.)
• Manually — a link to create a lead/deal will appear in the chat.
Source for a new lead — Bitrix24 will specify the source from which the client contacted you.
Route request to the responsible employee when the client is identified — if the client already exists in the CRM, the chat is routed to the responsible employee.
Automatically change the lead owner when manually forwarding the request to another operator — if the chat is manually transferred to another employee, Bitrix24 will assign them as responsible for the CRM record. If the option is disabled, the employee who first accepted the request will remain responsible. Automatic reassignment only works for leads and deals created based on the chat. For existing CRM entities, the responsible employee will not change.
After configuring the “Queue” section, click Save.
After configuring the “Working Hours” section, click Save.
This section configures automatic actions for the Open Line, more details.
These settings work only within the Bitrix24 open line and are not transferred to the ChatApp service.
In the ChatApp service, you can configure chat bots for your company’s tasks and business processes.
You can track KPI metrics in the “Dialog List” section by selecting the required display parameters.
Line is active — if the open line is disabled, incoming messages will not be delivered to Bitrix24.
Save message history — conversations are saved in the chat, in the client card, and in open line statistics.
Show confirmation window when closing a dialog — when enabled, operators receive a warning before closing a chat.
Language preference settings — select the language for system messages and emails containing chat history (by default, the portal language is used).
Delete open line — deleting an open line will remove all related dialogs.
After making changes, click “Save”.