ChatApp in SalesBot
How to open ChatApp in SalesBot:
Step 1. In the pipeline, click “Settings” → select the stage where SalesBot should be triggered.
Step 2. Click “+ SalesBot” → click create a new bot.
Step 3. In the bot editor, open “Widgets” → in the ChatApp widget click “Add” → select the required action.
ChatApp widget capabilities:
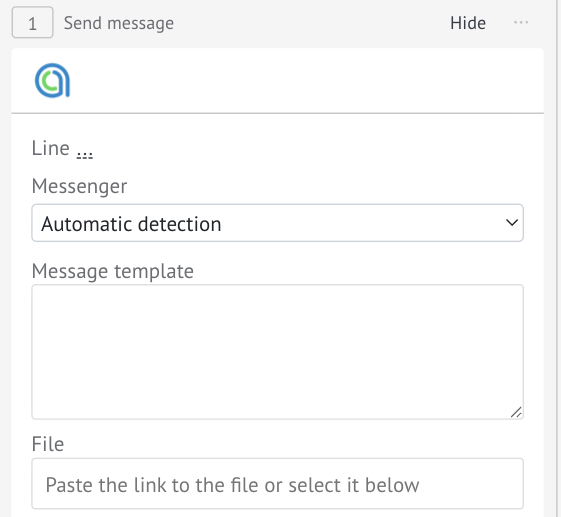

In the “Line” field — select the line to send the message through.
“Automatic detection” — the SalesBot will send the message to the last active conversation with the client.
In the “Messenger” field — select the channel for sending the message.
“Automatic detection” — the bot will send the message through the messenger in which the client last communicated.
In the “Message template” field — specify the message text.
To add variables to the text, click “Parameter 1” → “three dots” and select a variable value. If multiple variables are needed, click “Expand all parameters” → “three dots” and select each value.
In the “File” field — add a file via a public link or select a specific file.
In the “In group” field — choose whether SalesBot should work in group chats.
In the “Specify your contact” field — you can set a contact to notify the responsible manager about the SalesBot trigger.
In the “Contact selection” field — determines the recipient if there are multiple contacts in the deal:
“Main contact” — send to the main number;
“Contact with group” — send to a group chat if available in the deal;
“All contacts” — send to all contacts in the deal.
❗️If there are no subsequent actions after the block — add “Stop bot”
in the “On success” and “On error” branches.
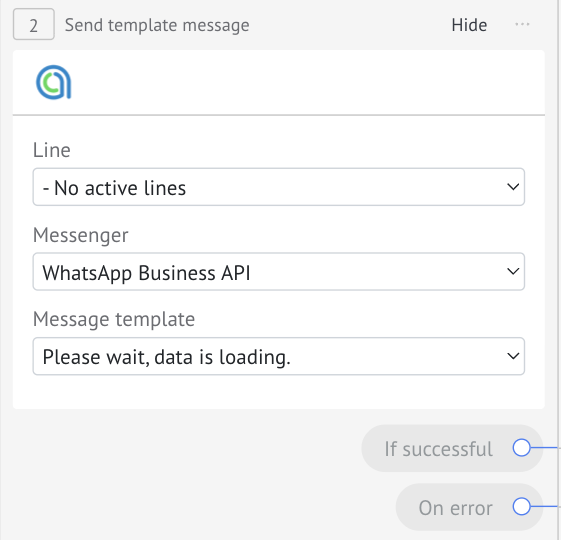
In the “Line” field — select a line with WhatsApp Business API or WhatsApp Cloud API channel to send a template message.
In the “Messenger” field — select WhatsApp Business API or WhatsApp Cloud API channel.
In the “Template message” field — select the required template from the list.
If the template is not in the list — check it in the ChatApp account.
❗️If there are no subsequent actions after the block — add “Stop bot”
in the “On success” and “On error” branches.
Before configuring the block — create a tag in Scenario Dialogs following the instructions.
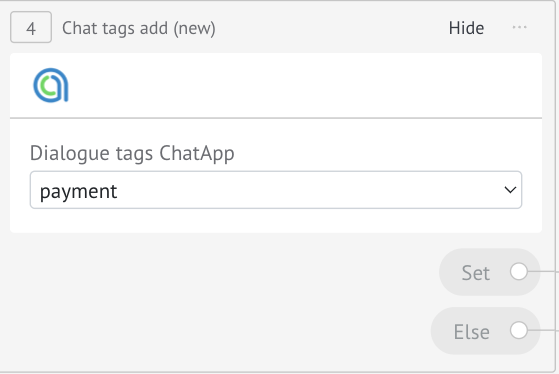
In the “ChatApp dialog tag” field — select from the dropdown the tag that should be assigned to the chat.
❗️If there are no subsequent actions after the block — add “Stop bot”
in the “Success” and “Otherwise” branches.

In the “Messenger” field — select the channel where the number should be checked.
The result of the check is split into two outputs:
“Available” — the number is found in the messenger → here you can place a message-sending block for this channel.
“Otherwise” — the number is not found → use this output to send a message via another channel or perform an alternative action.
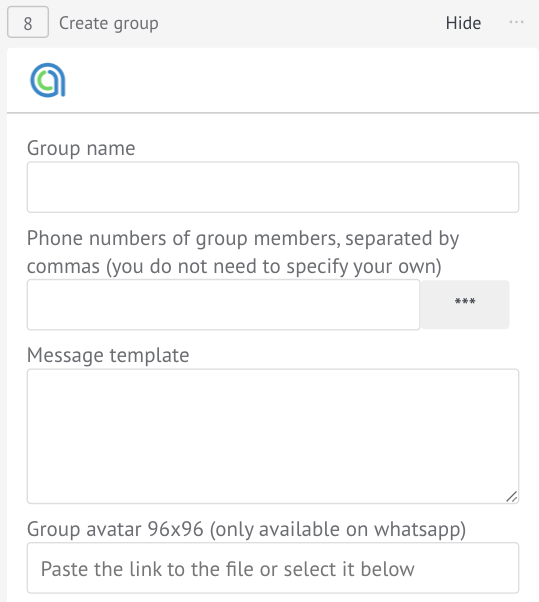
In the “Group name” field — specify the group name.
In the “Group participants phone numbers” field — enter numbers:
• manually — one or more numbers separated by commas;
• via variable — click “three dots” and select the field where the phone number is stored.
In the “Message template” field — specify the message text.
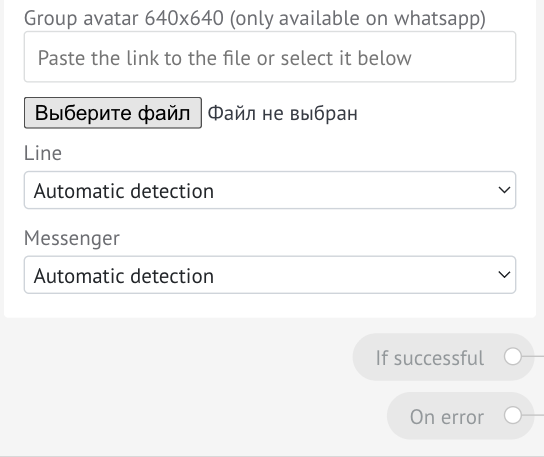
In the “Group avatar” field — select an image: (96×96 px or 640×640 px).
Upload a JPG file or provide a public link to the avatar.
In the “Line” field — select the line through which the group will be created.
“Automatic detection” — the group is created from the last active conversation.
In the “Messenger” field — select the channel for group creation.
“Automatic detection” — the messenger from the last client conversation is used.
❗️If there are no subsequent actions after the block — add “Stop bot”
in the “On success” and “On error” branches.

In the “Group ID” field — leave empty if you want to add a participant to the group from the deal card. If you always need to add users to the same group — specify the Group ID from Scenario Dialogs.
How to get Chat ID in Scenario Dialogs:
Open the group chat in Scenario Dialogs → go to the group card → under the name the Chat ID is displayed — copy it.
In the “Phone numbers” field — enter numbers:
• manually — separated by commas;
• via variable — click “three dots” and select the field where the client’s phone number is stored.
In the “Line” field — select the line where the group exists.
“Automatic detection” — the bot adds a participant to the group from the last active conversation.
In the “Messenger” field — select the channel where the group exists.
“Automatic detection” — the bot uses the messenger of the last conversation and adds the participant if the group exists there.
❗️If there are no subsequent actions after the block — add “Stop bot”
in the “On success” and “On error” branches.
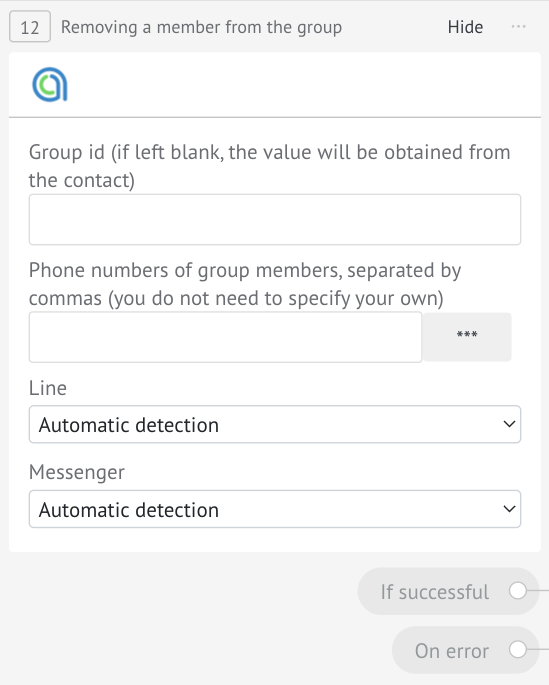
In the “Group ID” field — leave empty if you want to remove a participant from the deal card group. If you want to always remove participants from a specific group — specify the Group ID from Scenario Dialogs.
How to get Chat ID in Scenario Dialogs:
Open the group chat in Scenario Dialogs → go to the group card → under the name the Chat ID is displayed — copy it.
In the “Phone numbers” field — enter numbers:
• manually — separated by commas;
• via variable — click “three dots” and select the field where the client’s phone number is stored.
In the “Line” field — select the line where the group exists.
In the “Messenger” field — select the channel where the group exists.
❗️If there are no subsequent actions after the block — add “Stop bot”
in the “On success” and “On error” branches.
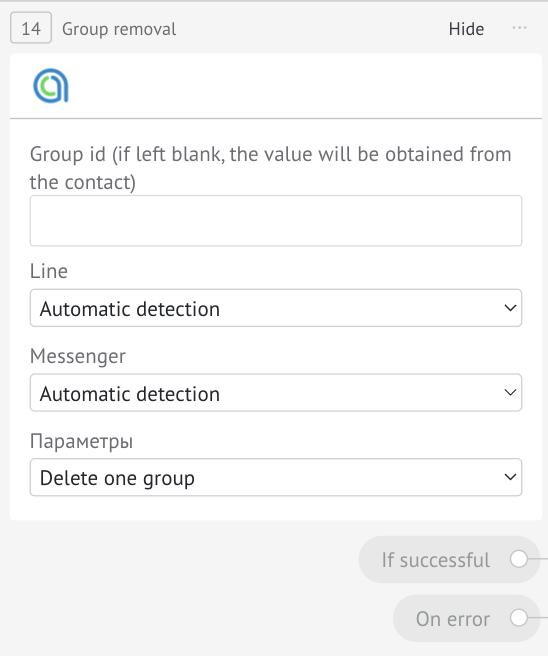
In the “Group ID” field — leave empty if you want to delete the group from the deal card. If you want to delete a specific group — specify the Group ID from Scenario Dialogs.
How to get Chat ID in Scenario Dialogs:
Open the group chat in Scenario Dialogs → go to the group card → under the name the Chat ID is displayed — copy it.
In the “Line” field — select the line where the group is located.
In the “Messenger” field — select the channel where the group is located.
In the “Parameters” field — choose an action:
“Delete one group” — deletes the group specified in the “Group ID” field. If the field is empty — the group from the deal card will be deleted.
“Delete all groups” — deletes all groups associated with this deal.
❗️If there are no subsequent actions after the block — add “Stop bot”
in the “On success” and “On error” branches.
For example, to make the bot address the client by name, you need to insert the variable {{contact.name}}. The name will be taken from the contact card.
Examples of variables
Value | Variable
Contact name — {{contact.name}}, {{name}}
Deal ID — {{lead.id}}
Contact ID — {{contact.id}}
Customer ID — {{customer.id}}
Deal source — {{origin}}
Received client message — {{message_text}}
Setting a deal custom field value (replace #custom_field_id# with the custom field ID) — {{lead.cf.#custom_field_id#}}
Setting a contact custom field value (replace #custom_field_id# with the custom field ID) — {{contact.cf.#custom_field_id#}}
Setting a company custom field value (replace #custom_field_id# with the custom field ID) — {{company.cf.#custom_field_id#}}
Responsible manager name — {{lead.responsible.name}}
Responsible manager email — {{lead.responsible.email}}
Responsible manager phone — {{lead.responsible.phone}}
Client email from message — {{message_text.email}}
Client phone from message — {{message_text.phone}}
Deal budget — {{lead.price}}
Current date — {{current_date}}
How to get additional field ID
Go to the deal and click “Settings”.
Click the required field — a settings window will open. The field ID is shown in the upper-left corner.
How to get field ID from the console
Go to any deal or contact and find the field whose value you want to use.
Right-click the field and select “Inspect element” or “View code”.
In the window, the field code will appear. The ID is located in square brackets after “CFV”.